Document Checklists
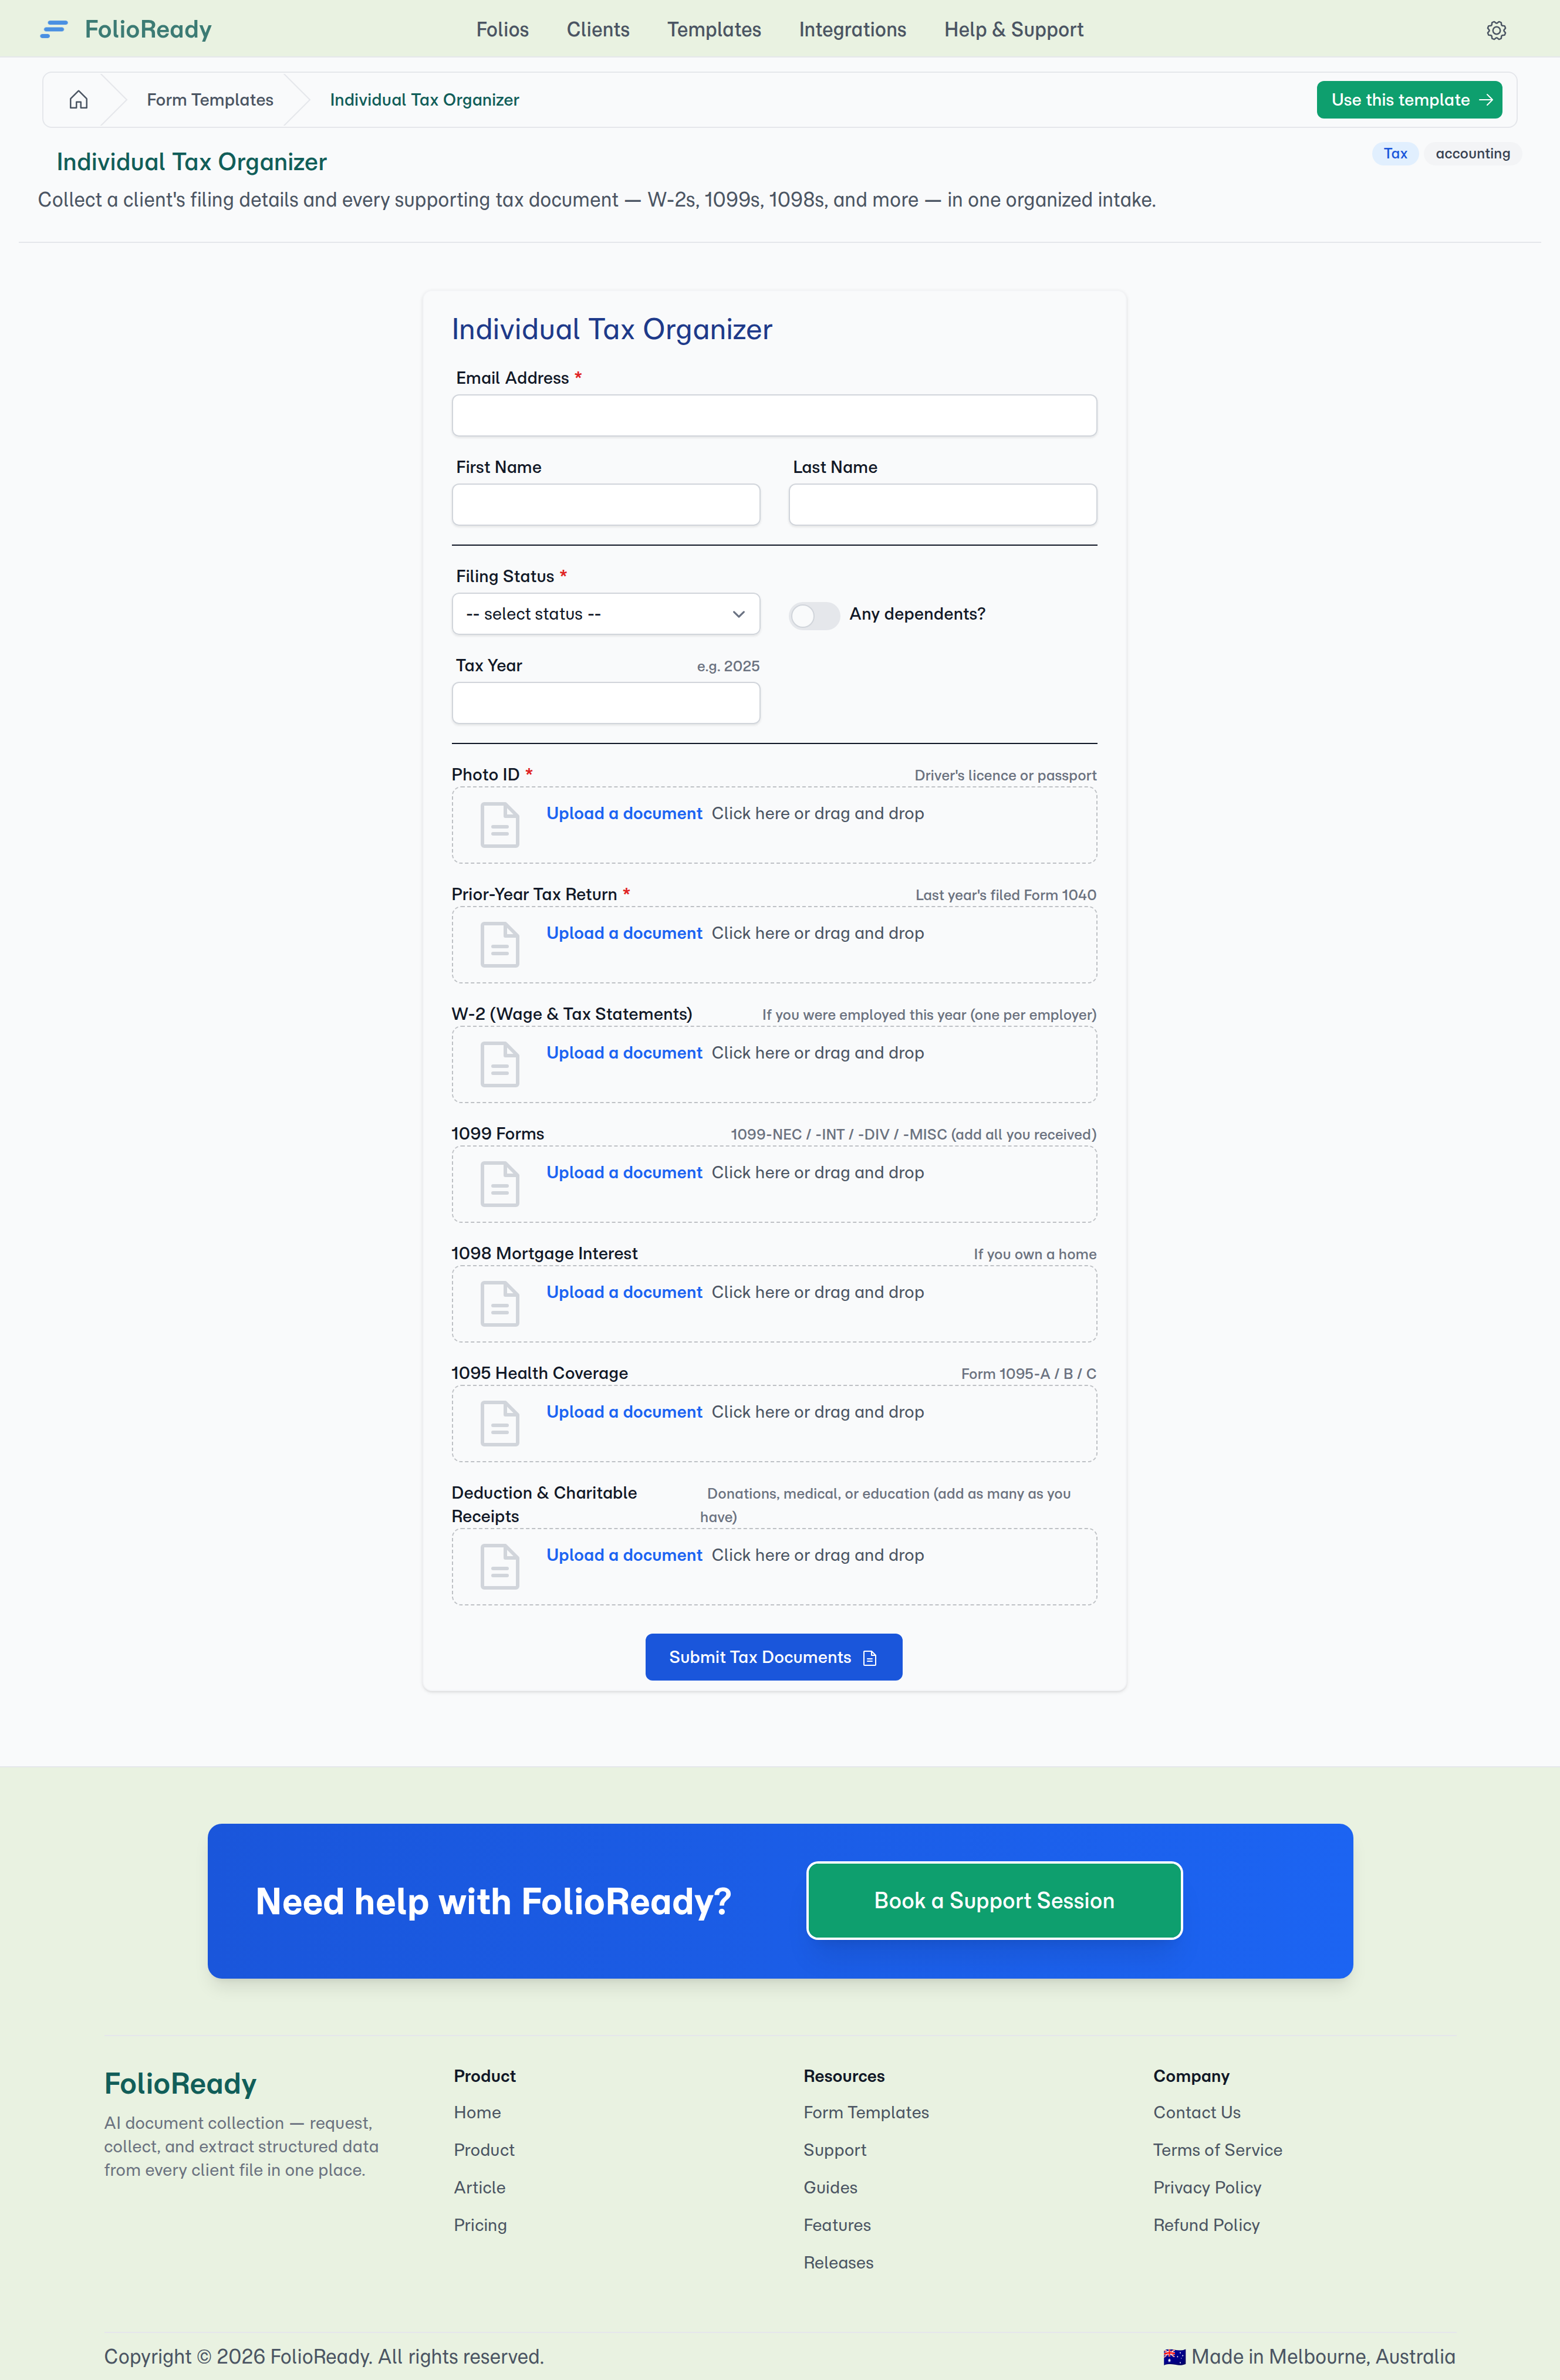
"Send me your documents" is where client collection goes to die. The client guesses what you meant, sends three of the five things, names the files scan001.pdf, and emails a sixth a week later. Document Checklists replace the guesswork: you specify the exact documents you need as a named, labelled list — W-2, bank statement, photo ID — and the client sees a tidy checklist with a slot for each. Every file lands where it belongs, and you can see at a glance what's still missing.
Why Use Document Checklists?
Ask for exactly what you need
Each document is its own slot with a name, an optional hint ("Passport or driver's licence"), and a required-or-optional marker. The client works down the list like a checklist — there's no ambiguity about what to send, and a required slot won't let the form be submitted empty. You stop chasing missing paperwork because the form does it for you.
One slot, one file — or a whole stack
Some documents are singular — one photo ID, one prior-year tax return. Others come in piles: a year of bank statements, a shoebox of receipts. Each slot is set to accept exactly one file or as many as the client has, so a "Deduction & Charitable Receipts" slot takes the whole stack while "Photo ID" stays a single file.
AI sorts loose files into the right slot
Clients don't always use the form. They email you a folder of documents, or you drop a batch onto the folio yourself. Instead of leaving those files in an anonymous pile, FolioReady reads each one and matches it to the document slot it belongs in — a payslip lands in the W-2 slot, a statement in Bank Statement — so your checklist fills itself in. If a match is ever wrong, one click unbinds it.
The client sees a clean checklist — nothing else
The portal shows your named slots and nothing more. There's no catch-all "upload anything here" box for clients to dump files into — that keeps submissions structured and predictable. The loose-file inbox lives on your side of the folio, for documents that arrive by email or that you add yourself.
How It Works
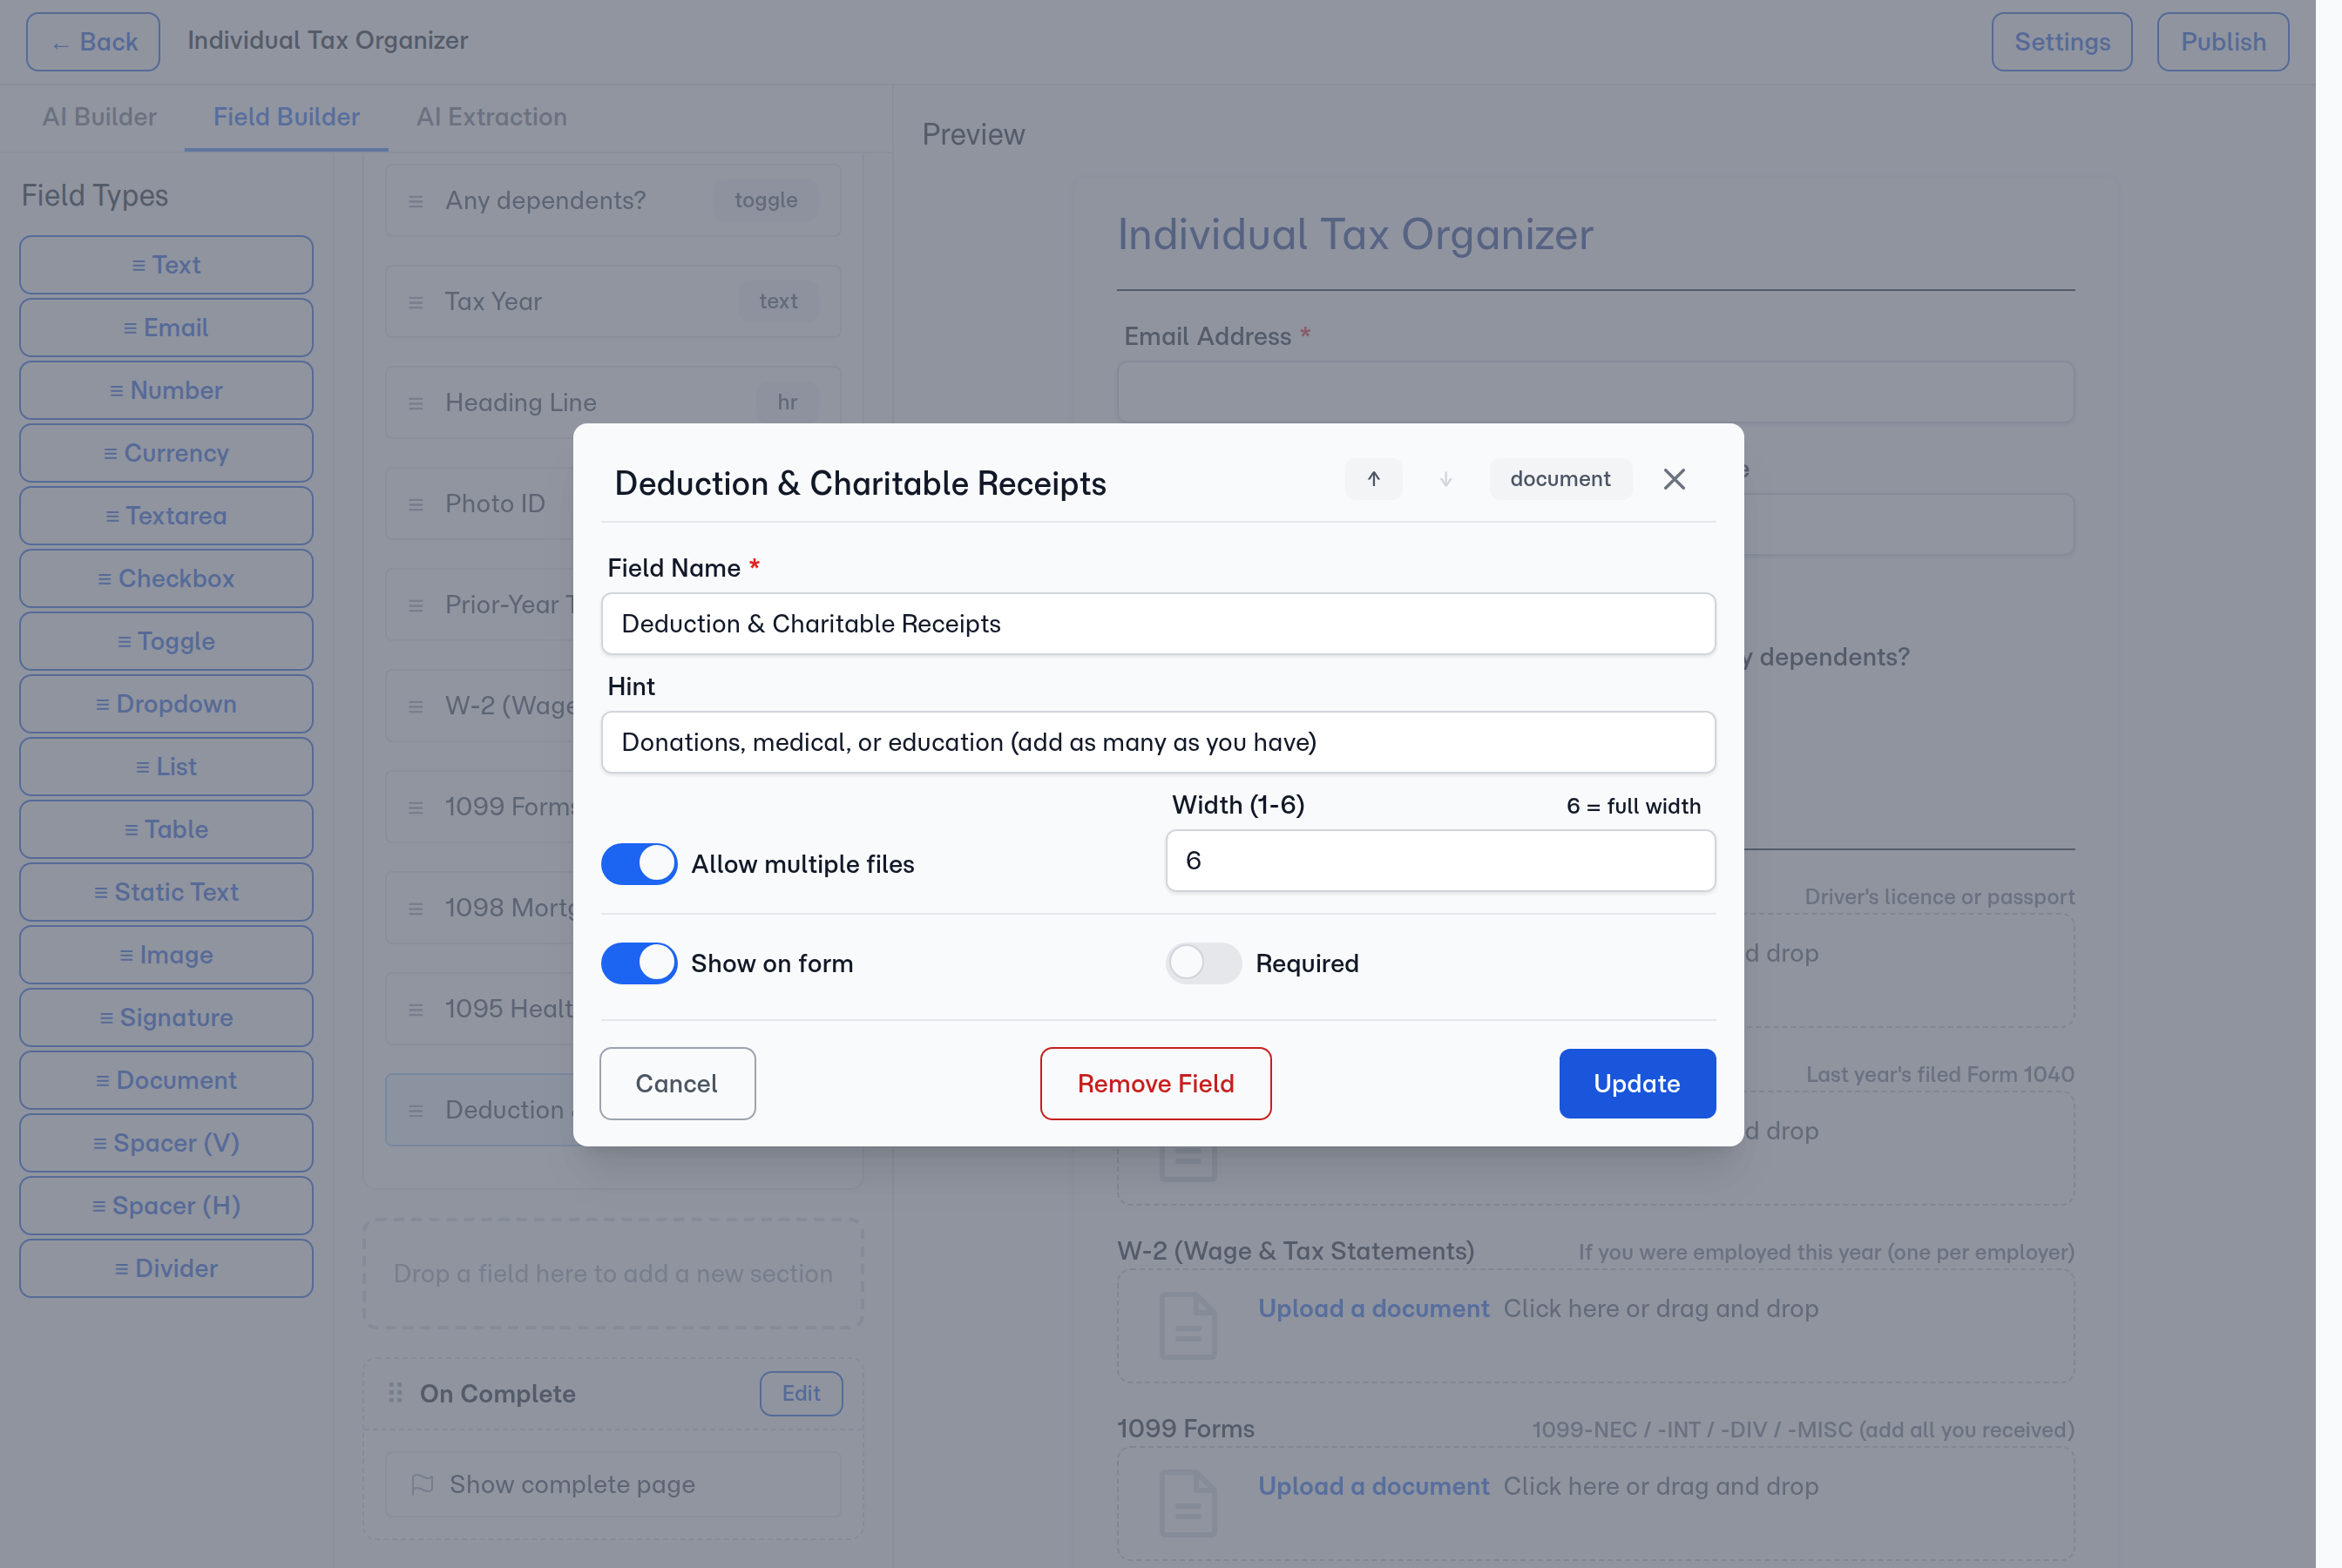
1. Build the checklist
In the template builder, add a Document field for each thing you want to collect. Give it a name and a hint, mark it required or optional, and turn on Allow multiple files for the slots that take more than one document.
2. The client fills in the checklist
On the portal, the client sees each slot with its label, hint, and required marker. They upload against each one; a multi-file slot keeps a running list with the dropzone open to add more. A required slot must be filled before the form will submit.
3. Files that arrive loose get matched automatically
When a client emails documents in, or you add files to the folio yourself, FolioReady reads each file and matches it to the best-fitting slot — binding it there when it's confident. Files it can't confidently place stay in the folio's loose-file area for you to sort by hand.
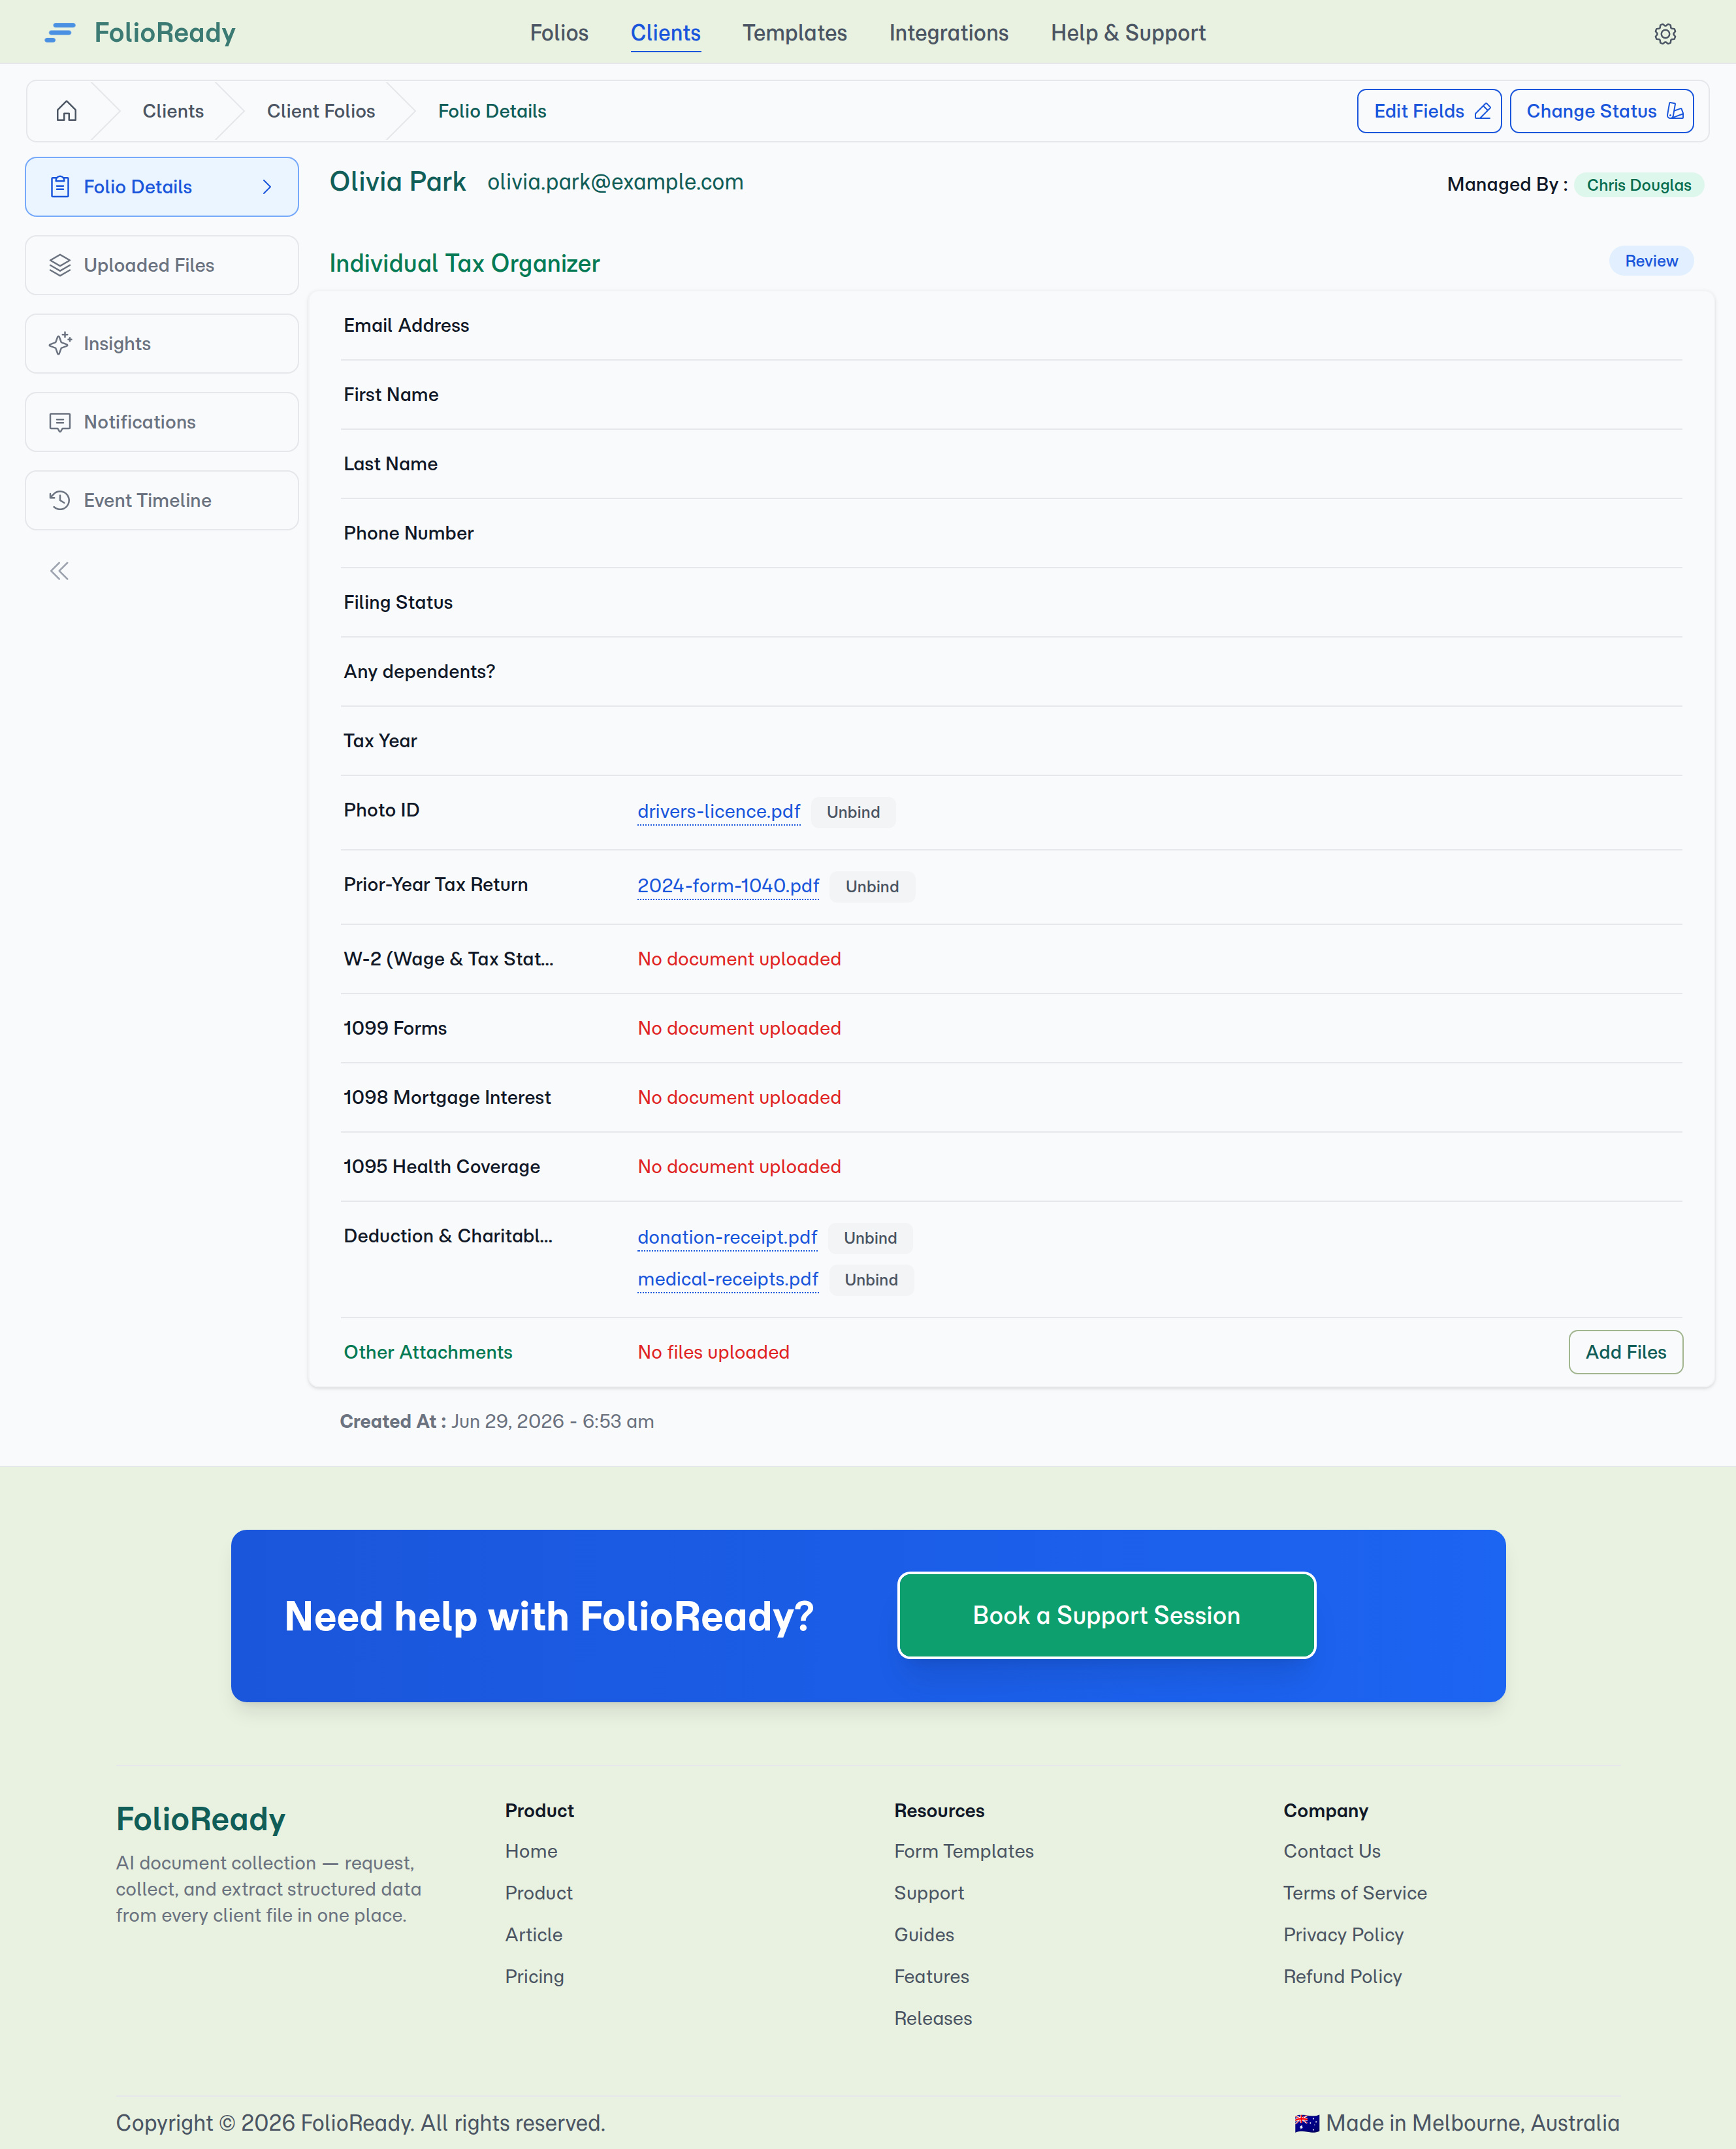
4. Review every document at its slot
On the folio's detail view, each document sits at its slot — open it to read, or unbind it if it landed in the wrong place. The loose-file area still holds anything emailed in or added by hand that hasn't been matched, plus an Add Files button for documents you're attaching yourself.
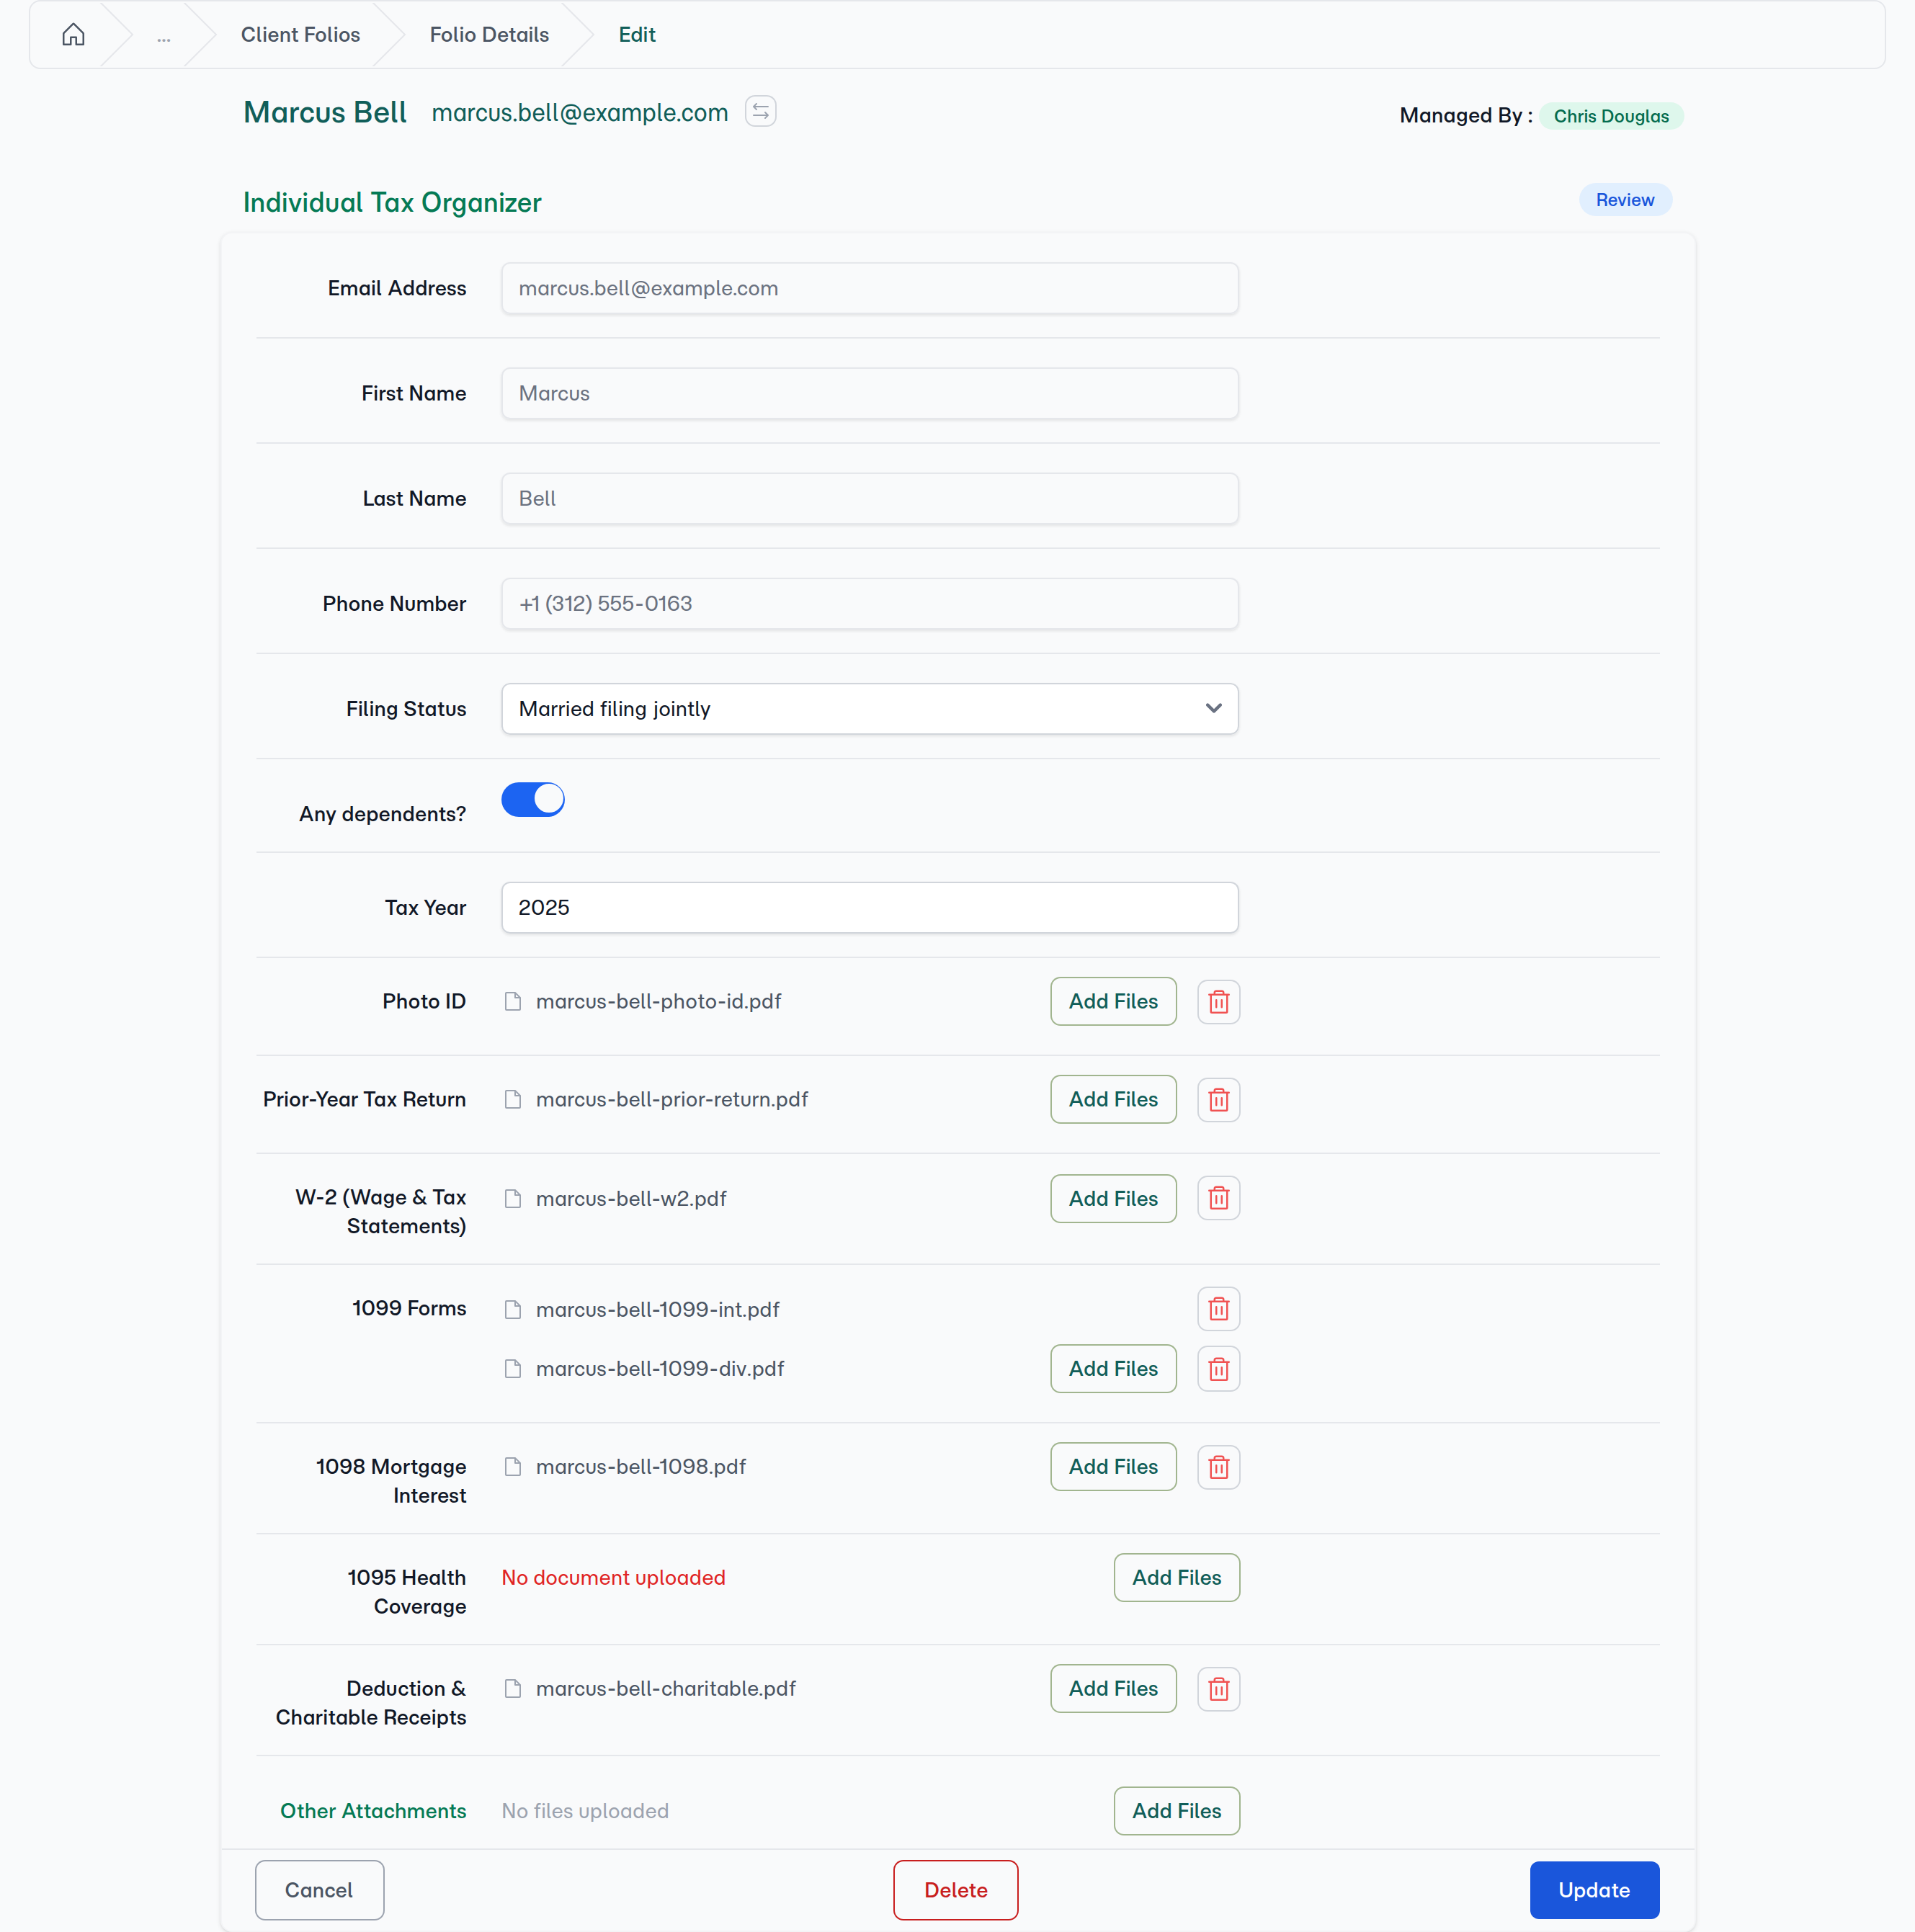
5. Manage the checklist when you edit the folio
Editing a folio shows the same checklist, ready to work on. Every slot is there with its documents — Add Files on a slot uploads straight into it, and each file has a remove control for swapping out an outdated version. Documents you can't classify go under the folio's own attachments list at the bottom. A captured signature stays visible on its row but can't be removed — it's your submission evidence.
Configuration
Document Checklists are built into the template builder — add Document fields to any template's sections. Several catalog templates ship ready to use and import:
| Template | What it collects |
|---|---|
| Individual Tax Organizer | Filing questionnaire plus a tax-document checklist — W-2s, 1099s, 1098, prior-year return, deduction receipts (multi-file where it counts) |
| Document Collection | A general named-document request — photo ID, proof of address, bank statement, signed agreement |
| Monthly Bookkeeping | Period statements and receipts as recurring multi-file slots |
| Client Onboarding | The ID / registration / financials document triad |
AI auto-match uses your company's AI provider setup and counts against your AI usage allowance, the same as field extraction and document synopsis. If you hit your usage limit, matching is skipped for that file — it stays in the loose-file area, ready for you to place by hand.
Tips
- Mark only the truly-required documents required. A required slot blocks submission until it's filled — reserve it for documents you genuinely can't proceed without, and leave the rest optional so clients can submit what they have.
- Turn on "Allow multiple files" for anything that comes in batches — statements, receipts, invoices. A single-file slot is right for one-of-a-kind documents like an ID or a signed agreement.
- Auto-match is a helper, not a filing clerk. It's confident most of the time, but always glance at where files landed and unbind anything misplaced before you act on a folio.
Related
- Document Synopsis — Turn every uploaded file into a one-paragraph summary you can scan
- AI Automation — Automatic field extraction from uploaded documents
- Email Ingestion — Let clients forward documents in by email
- File Storage Integrations — Send collected documents straight to your own storage