Email Ingestion
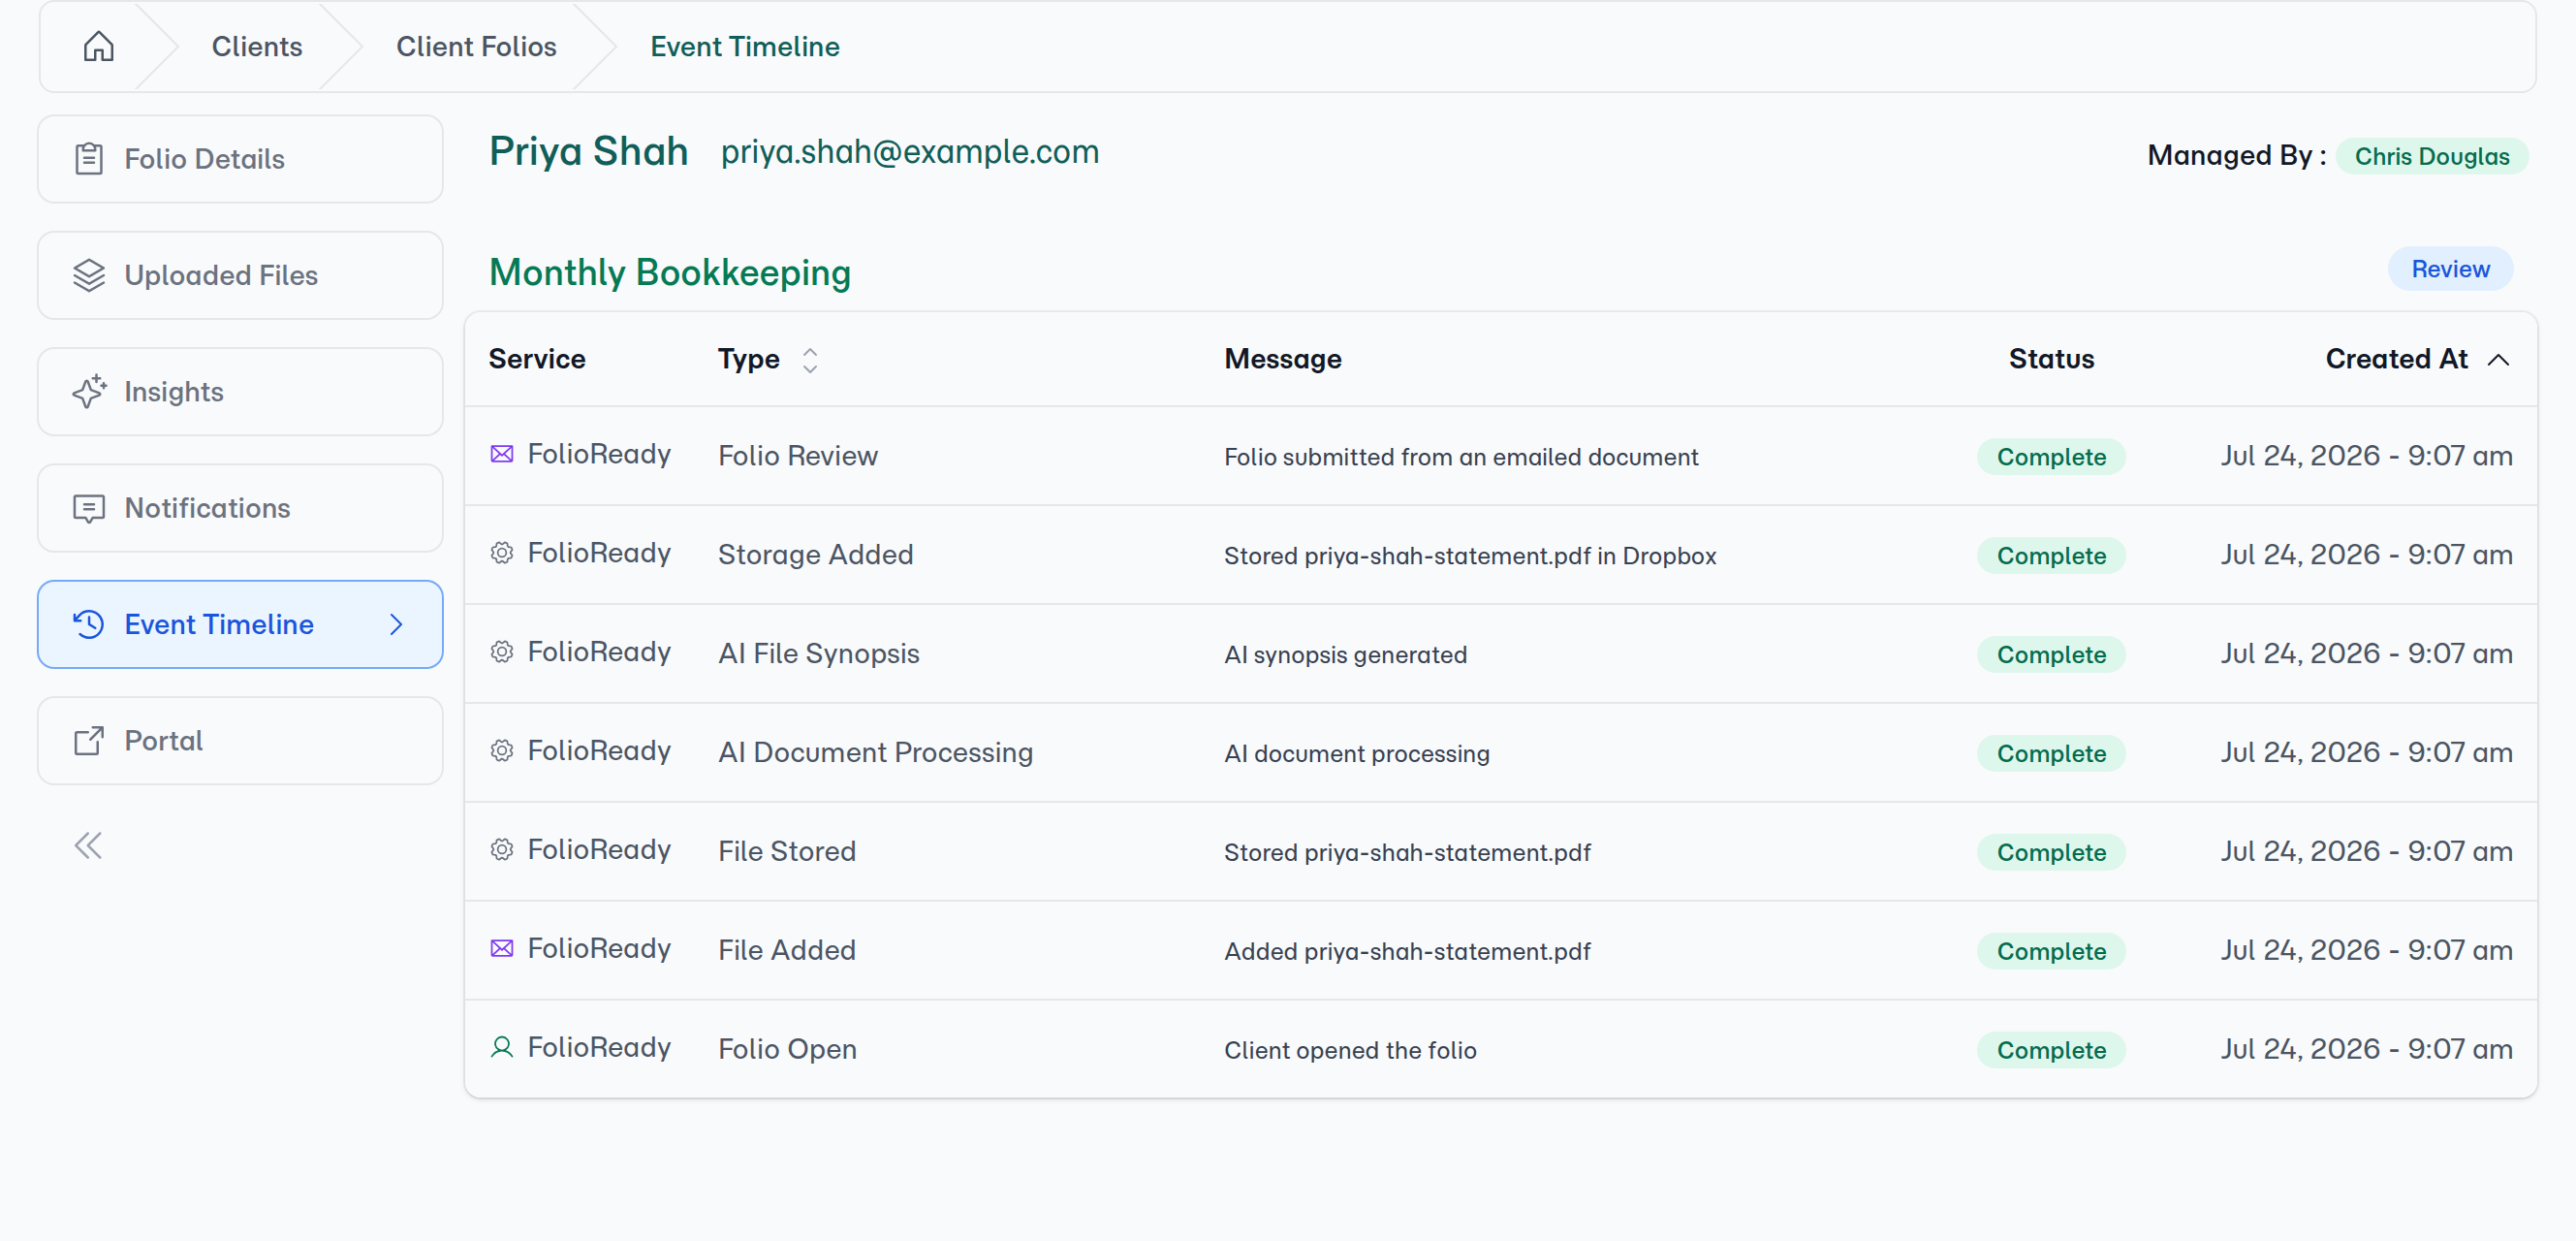
Not every client wants to log into a portal and fill out a form. Some clients — especially the ones you've worked with for years — would rather just email you their documents the way they always have. Email ingestion lets them do exactly that. Clients send an email with attachments to a dedicated address, and FolioReady creates the folio, stores the files, and notifies you for review.
Why Use Email Ingestion?
Clients don't need to learn anything new
No portal login, no form to navigate, no new software to figure out. Clients send an email with attachments — the thing they already do every day. The barrier to getting documents back is as low as it gets. For clients who are less comfortable with technology, or who just prefer the way things have always worked, email ingestion removes every point of friction.
Documents land where they belong
Every folio has its own email address, so a client who sends one document today and another on Thursday adds both to the same folio instead of leaving you to reconcile them. Send them the general address instead and each email starts a new folio, which is what you want from someone you haven't started an engagement with yet.
Either way there is no manual data entry, and no downloading files from your inbox to re-upload them somewhere else. The files are attached and you get a review notification — all before you've opened your email.
Pair it with AI extraction for hands-free processing
If you've enabled AI extraction on the template, incoming documents are processed automatically. Fields are extracted, data is structured, and confidence levels tell you where to focus your review. A client emails a tax return, and by the time you open the folio, the key figures are already filled in.
How It Works
1. Find the email address
Addresses are shown on the Portal & Email tab, alongside the portal link. There are two you will use:
- A template's address — for a client you have not started an engagement with. Each email creates a new folio using that template's settings.
- A folio's address — for a client mid-engagement. Everything sent there joins that folio, however many emails it takes.
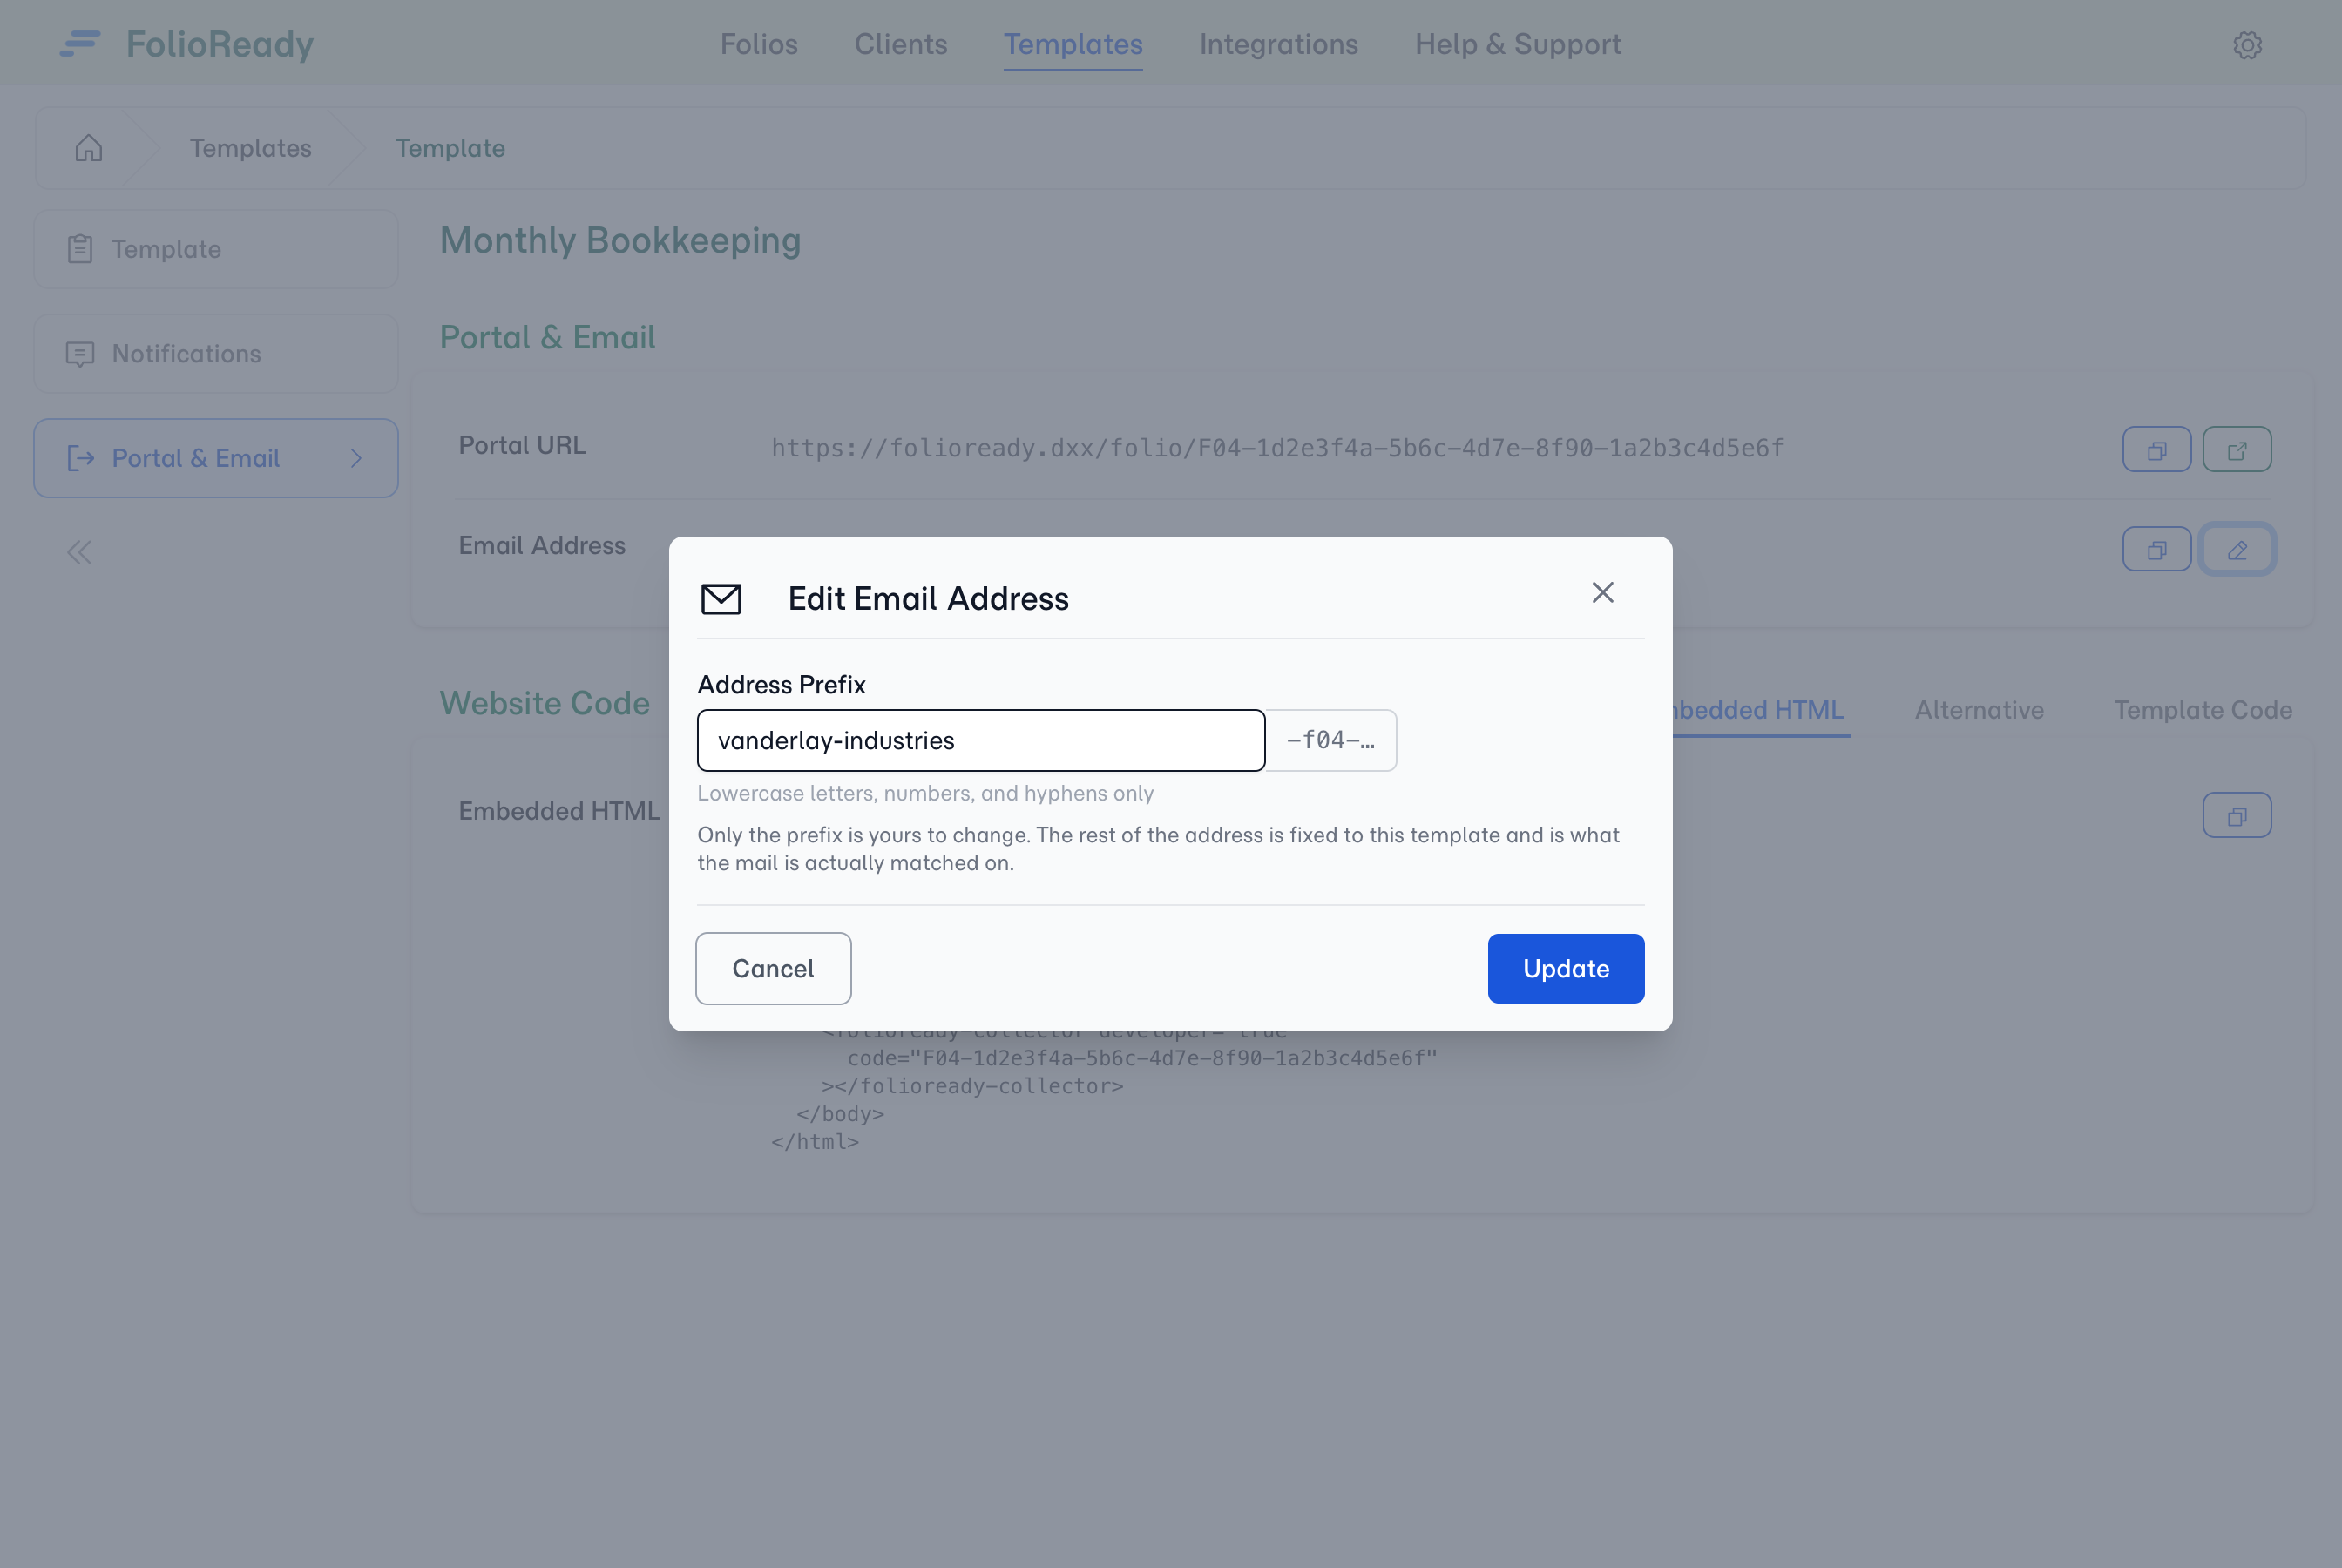
An address looks like acme-corp-f04-90-12563372@ai.folioready.com. Only the prefix at the front is yours to change; the rest is fixed to the template or folio and is what the mail is matched on, so nothing else should be edited or retyped by hand.
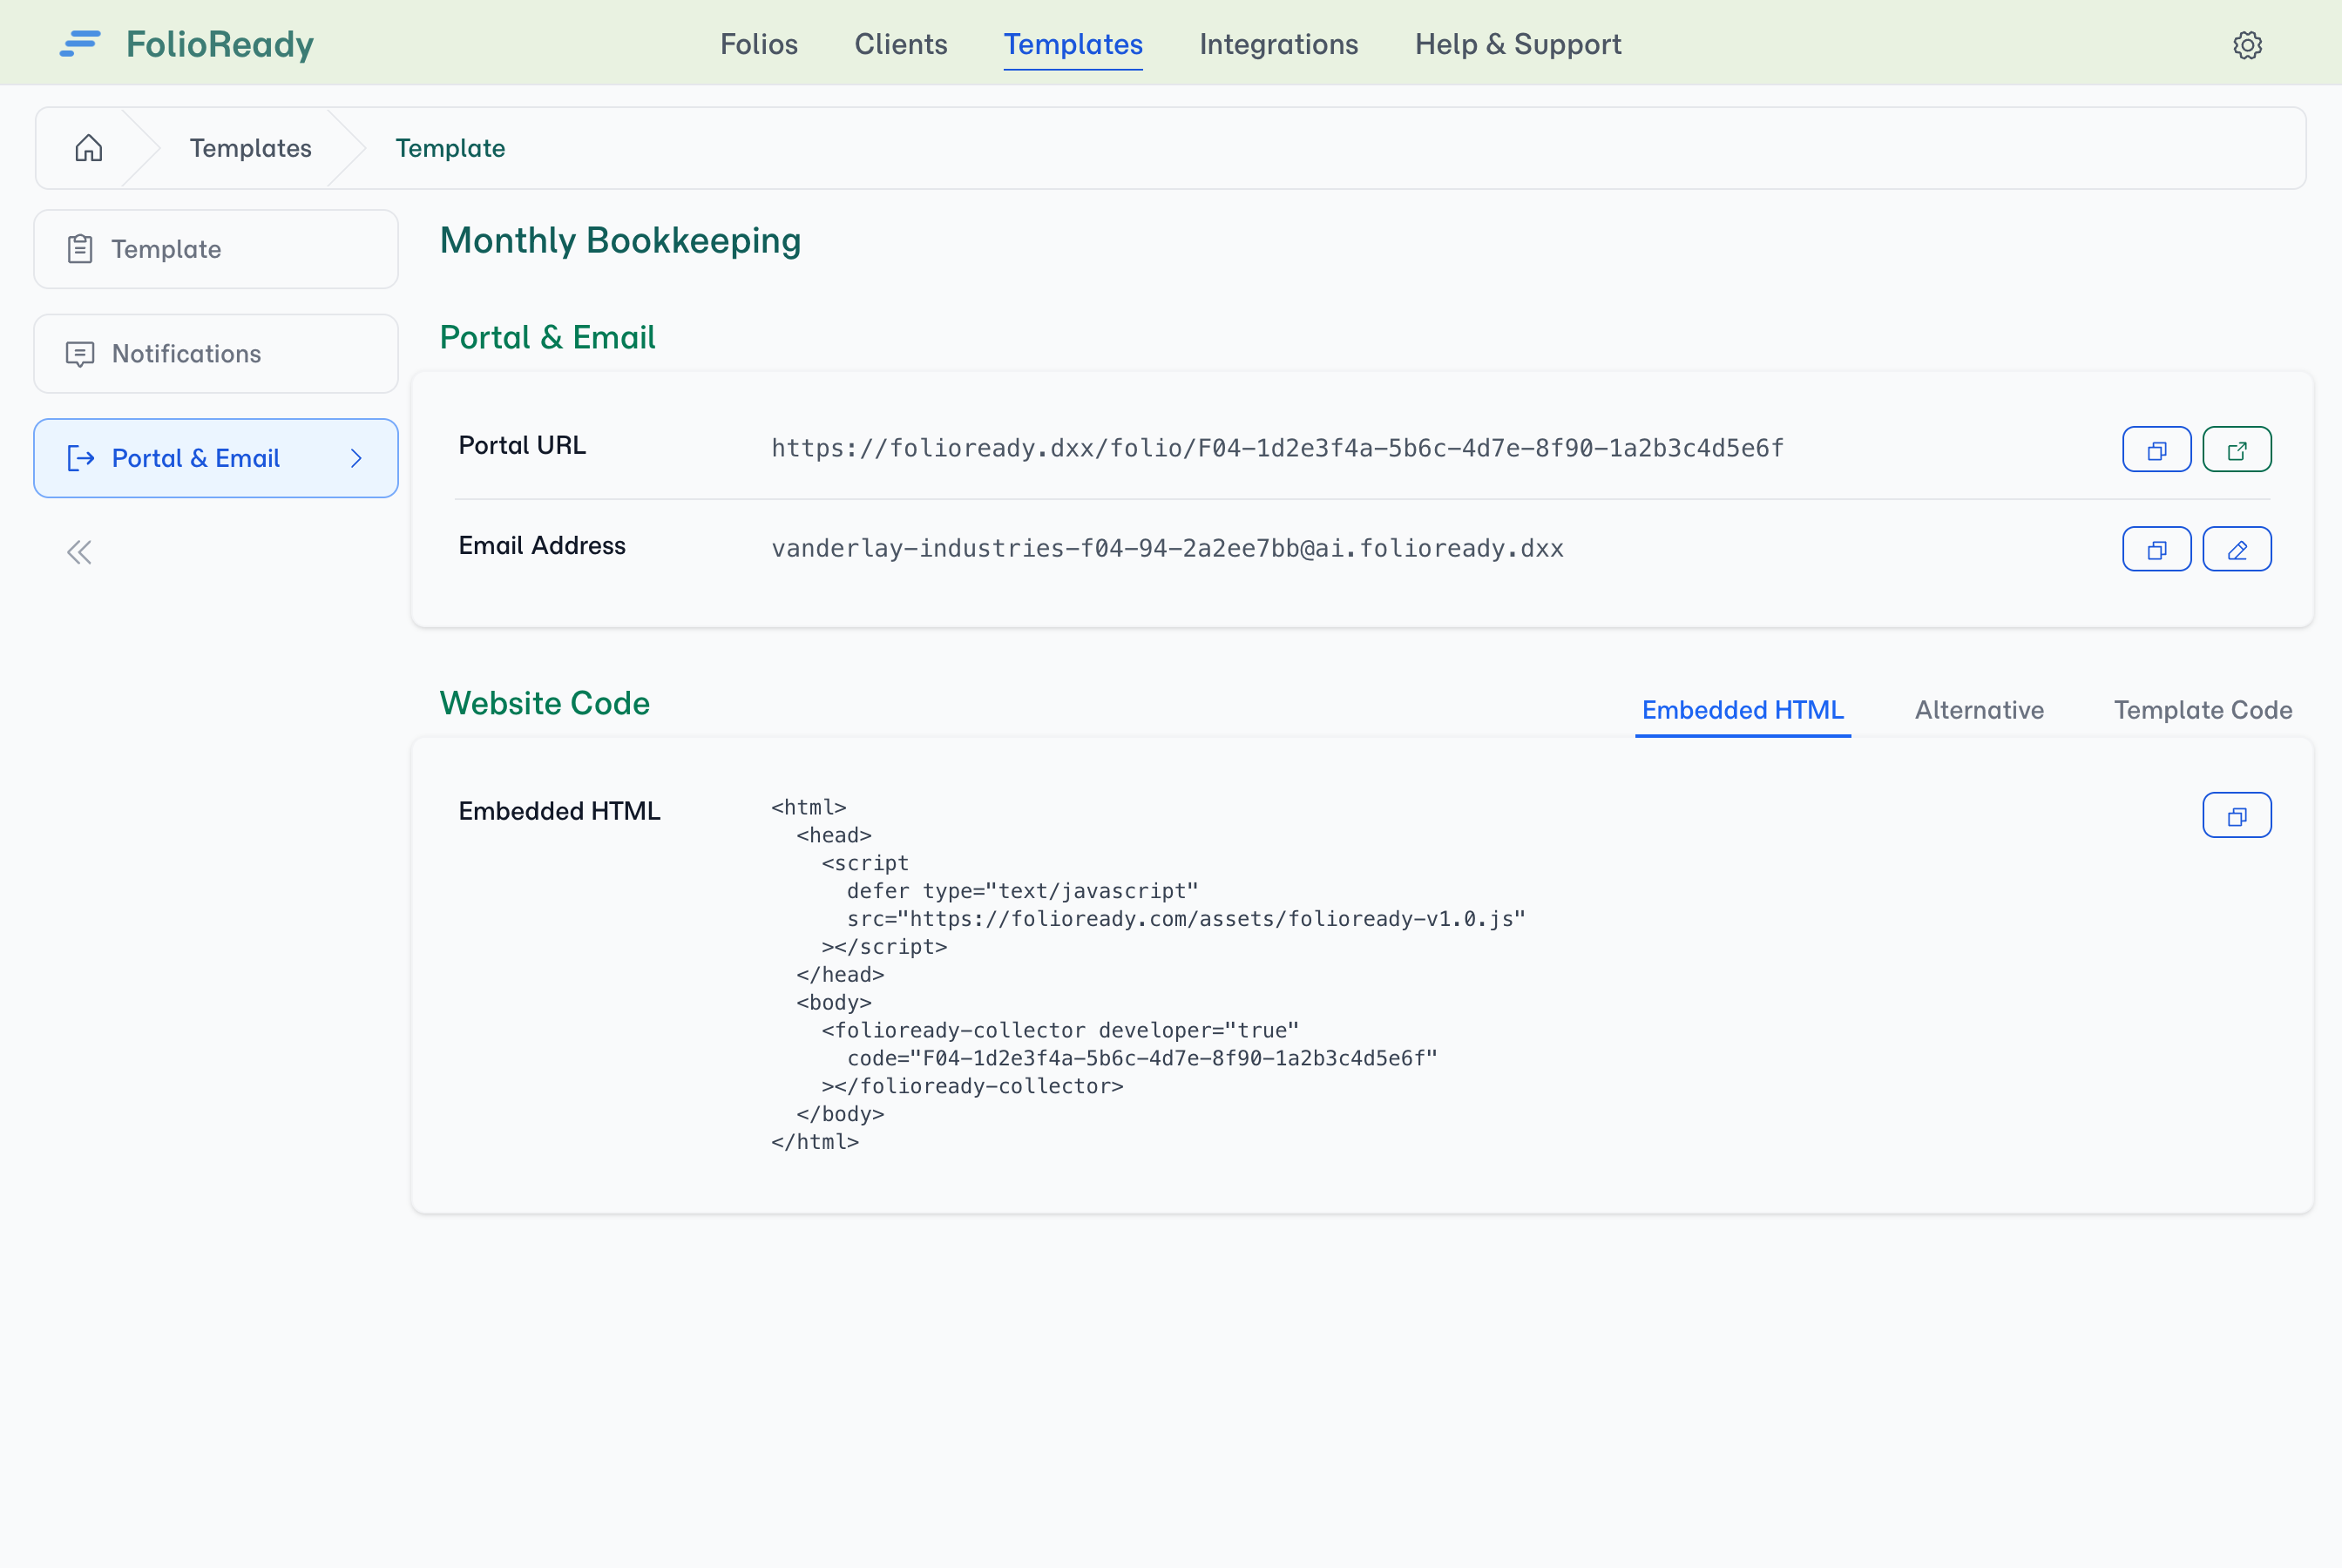
Use the pencil beside the address to change the prefix. Leave it blank if you would rather not have one.
2. Share the address with clients
Put a template address wherever your clients will see it — in your email signature, a welcome packet, printed materials. Clients don't need an account or an invitation, just the address.
A folio has its own address as well, and that is the one to use once an engagement is under way — everything sent there joins that folio. You don't have to copy it across by hand: add the Folio Email Address variable ({{folio_email_address}}) to your request, reminder or update email, and every client receives the address for their own folio.
Replies to those emails still come back to you rather than into the folio, so a client's question never disappears into a pipeline.
3. Clients send their documents
Clients compose an email, attach their files, and send. PDFs, images, spreadsheets, Word documents — the usual file types your clients already work with. No special formatting required.
4. FolioReady processes the email
Mail to a folio address goes straight into that folio, whose client is already known. Mail to a template address creates a folio and identifies the client from the sender — linking an existing contact if there is one, creating one if not.
A folio that is finished — accepted, expired or closed — will not be reopened by an inbound email, so a late reply on a closed engagement never quietly changes it.
5. AI extraction runs (if enabled)
If the template has AI extraction configured, it runs automatically on the uploaded documents. Fields are filled in with extracted values and confidence levels, just like they would be for portal uploads.
6. You review the folio
You receive a review notification. Open the folio and everything is there — files stored, fields extracted, client linked. Review the results, accept or correct values, and move on.
When to Use Email Ingestion vs Portal Forms
Email ingestion and portal forms both collect documents from clients, but they serve different situations.
Email ingestion works best when:
- Clients aren't tech-savvy or are resistant to new tools
- Documents are ad-hoc — clients send what they have, when they have it, across several emails
- You're replacing an existing "just email it to me" workflow
- Volume matters more than structure
Portal forms work best when:
- You need specific fields filled in alongside file uploads
- Documents must follow a particular order or structure
- You want validation before the client submits
- The client relationship is new and a guided experience helps
You can use both across different templates. A structured portal form for new client onboarding, and an email address for ongoing document collection — each template gets the method that fits.
Getting Started
- Open the template you want clients to email
- Go to its Portal & Email tab to find the email address (use the pencil to change the prefix, or leave it blank)
- Copy the address and share it with your clients
- Documents start flowing in — review folios as they arrive
For a client already mid-engagement, use that folio's own Portal & Email tab instead — every folio has a direct address, and everything sent there joins that folio. Add the Folio Email Address variable ({{folio_email_address}}) to your request, reminder or update email so each client gets theirs without you copying it across.
Related
- AI Automation — Automatically extract data from uploaded documents with AI
- Email Ingestion or Portal Forms? — Choose the right collection method based on your clients and document types