If a client with the same Attio person ID or email already exists, FolioReady links the existing client instead of creating a duplicate.
Connecting...
Tags:
crm
Attio Integration
Keep your CRM and document collection aligned. When you connect Attio, FolioReady imports people in two clicks, writes folio data directly onto your Attio records, and installs FolioReady widgets across your workspace — so your sales and success teams always see the latest status without leaving Attio.
Why Connect Attio?
Stop retyping contact details
Without the integration, you manually enter names and emails into FolioReady — even though the same people already exist in Attio. With the connection, search your Attio people and import them in two clicks.
Folio data lives on the Attio record
FolioReady creates custom attributes (prefixed with folioready_) on your Attio People and Deals. Your team sees folio status, completion counts, and other collected data right inside Attio — no tab switching.
Easy to spot, easy to clean up
Every attribute FolioReady creates uses the folioready_ slug prefix, so they're easy to find and audit in Attio's object settings. Disconnecting only stops future sync — your existing attributes stay put.
Works across People, Deals, and custom objects
Point a template at your Attio Person, a related Deal, or a custom object your workspace defines, then map any canvas field to an attribute on it. A folio's values, summaries, and files all file against that one record.
Act on FolioReady without leaving Attio
FolioReady adds a widget to your Person records and another to your Deal records. Open one to see the folios at a glance, link a Person to a FolioReady client, or kick off a new request — all without switching tabs.
What You Can Do
Import Attio people as FolioReady clients
Search your Attio people by name or email and import them as FolioReady clients. Contact details are pre-filled — no manual data entry.
No duplicates
Write folio data onto Attio records
In the FolioReady template builder, assign any canvas field to an Attio attribute. When a folio is completed, FolioReady writes the collected value onto whichever record that folio files against — the Person, a Deal, or a record of any other object your workspace defines.
You can pick an existing Attio attribute, or click "Create field" to have FolioReady create a new custom attribute for you — automatically prefixed with folioready_ to keep your schema tidy.
Keep your attribute schema clean
Every attribute FolioReady creates is prefixed folioready_. If you ever want to audit or remove them, a quick filter in Attio's object settings shows the full list.
See folio status on any record
Install the FolioReady app inside Attio and a widget appears on your Person pages and on every other kind of record — Deals, Companies, and your own custom objects. Each shows a folio count, the most recent request and its status, and lets you start a new request without leaving the record.
Prerequisites
- An Attio workspace with admin permissions (required to authorize the app and to create custom attributes)
- A FolioReady account on any plan
Connecting Your Account
- Navigate to Settings > Integrations in FolioReady
- Find Attio and click Connect
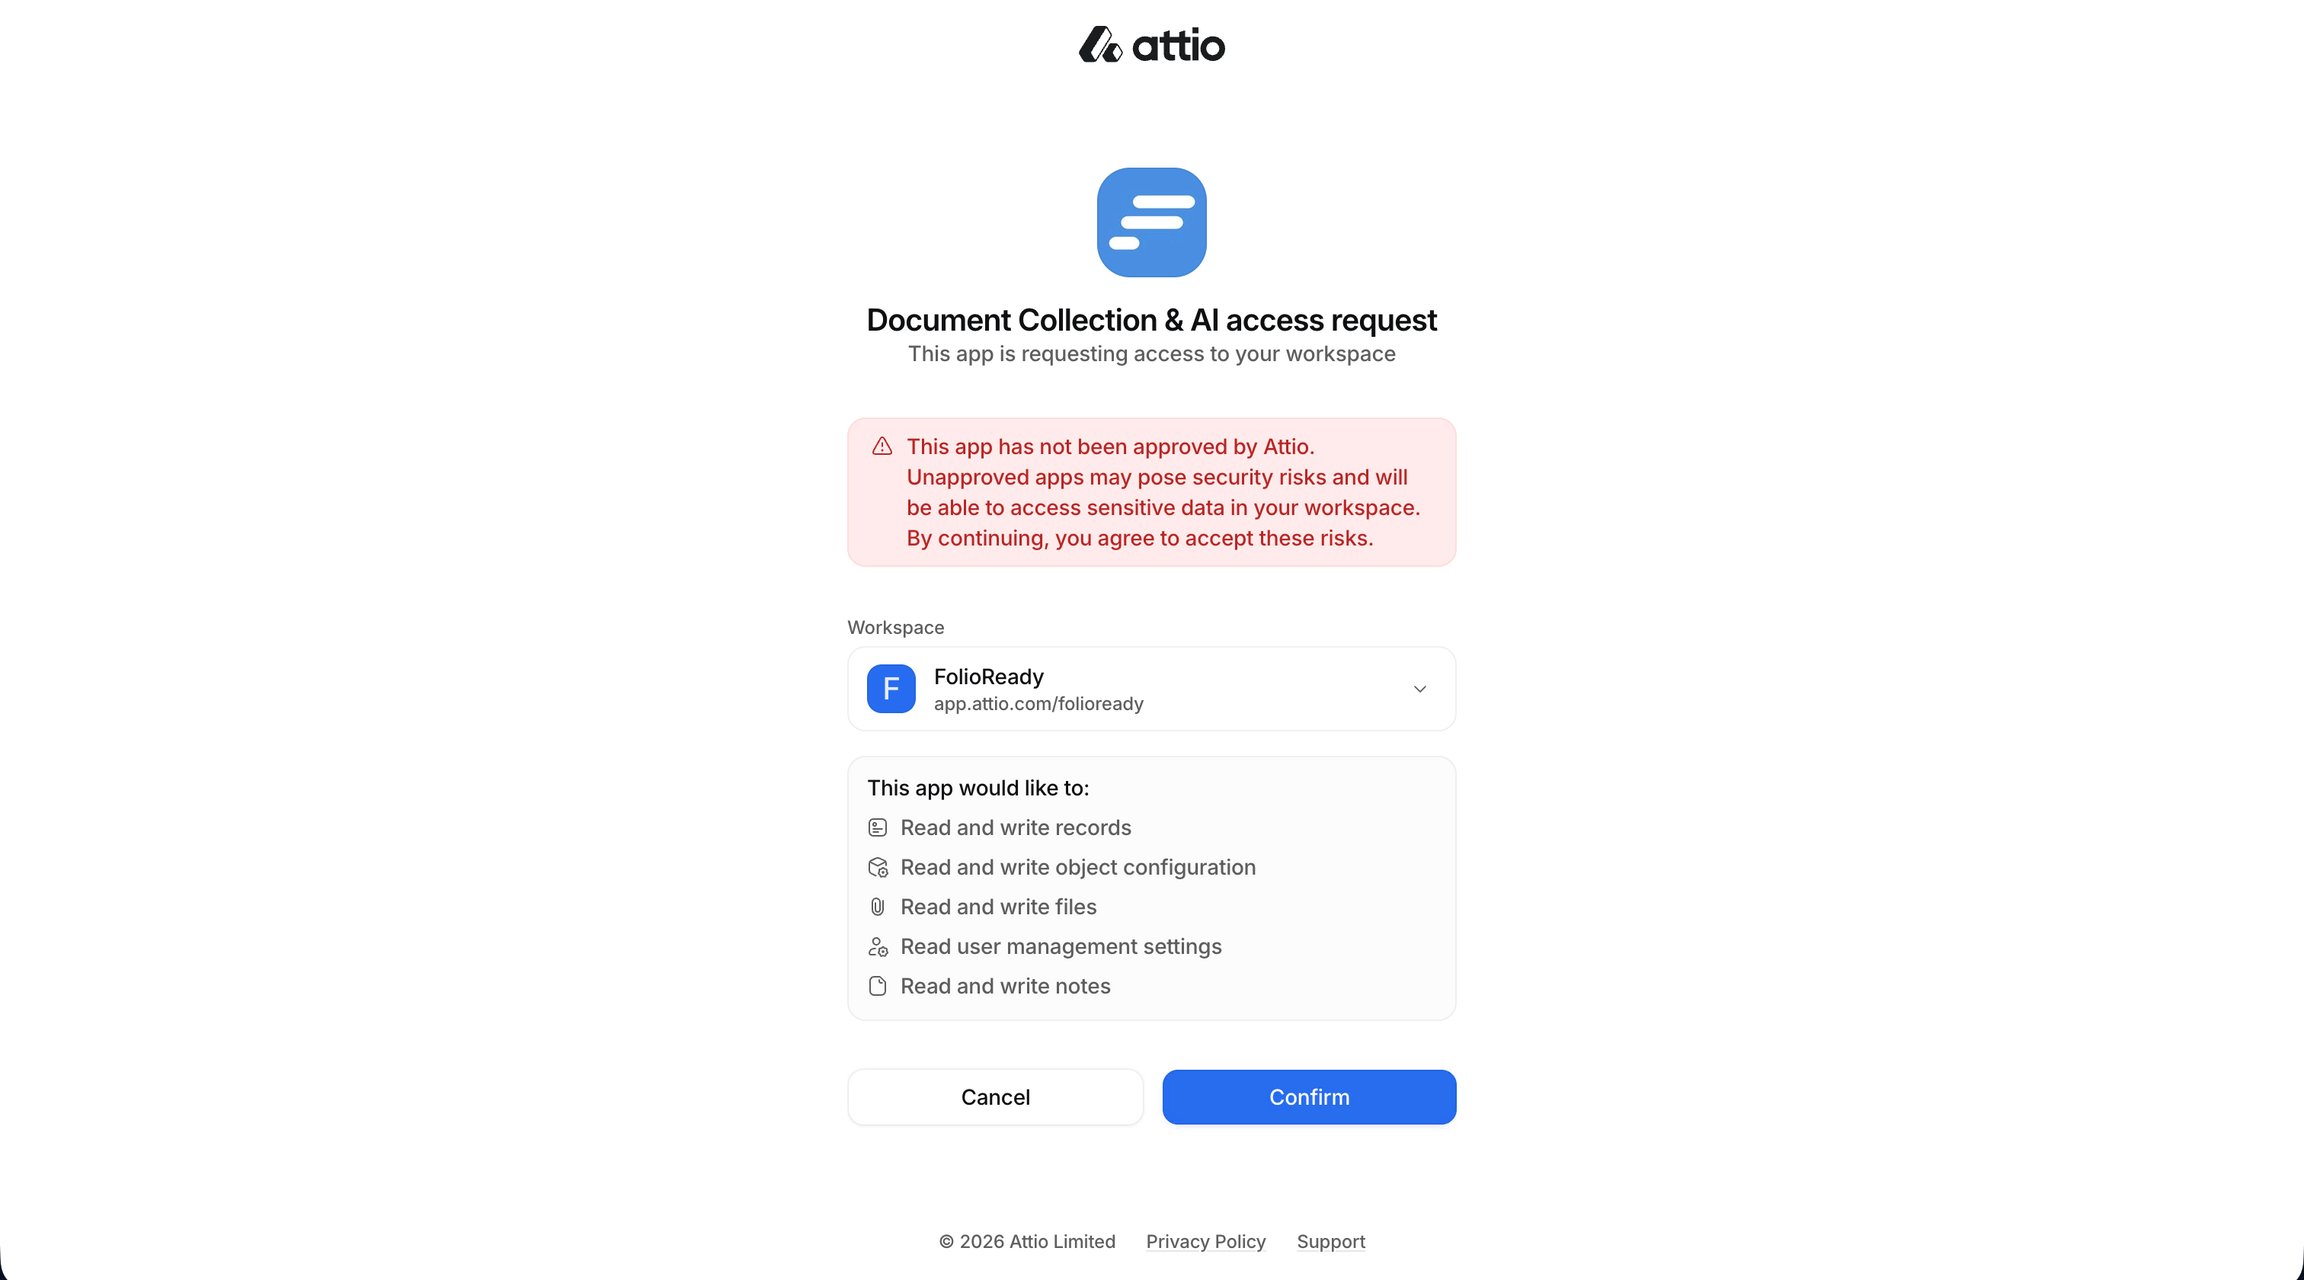
- You'll be redirected to Attio's authorization screen
- Select the Attio workspace you want to connect, then authorize FolioReady
- You'll be redirected back to FolioReady — the integration is now active
Attio requires the following permissions:
| Permission | What it's used for |
|---|---|
| Record read/write | Reading existing values and writing collected folio values onto the records your folios file against — any object in your workspace |
| Object configuration read/write | Reading the list of existing attributes and creating new folioready_* attributes |
| File read/write | Mirroring uploaded documents onto the record |
| Notes read/write | Posting each document's AI synopsis as a note on the record |
| User management read | Resolving the connecting user's identity |
| Workspace member read | Showing the connected workspace's name in your integration settings, and identifying the team member using the panel so clients they link are assigned to them |
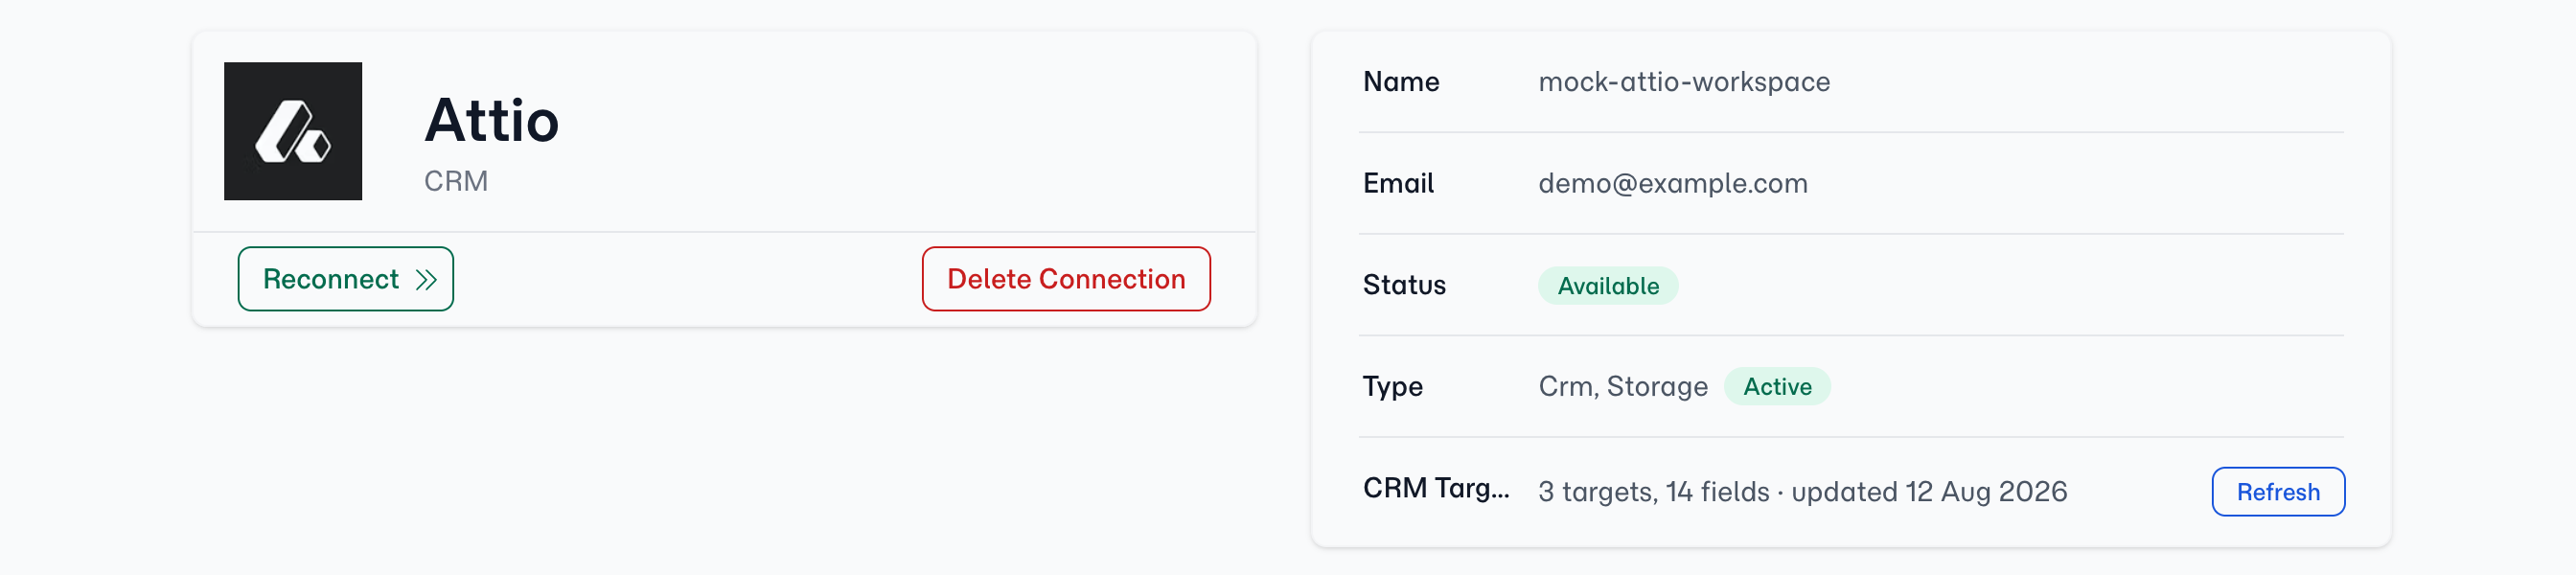
Once connected, FolioReady automatically sets Attio as your CRM service. New person imports and folio field syncs flow from that point forward.
Importing People
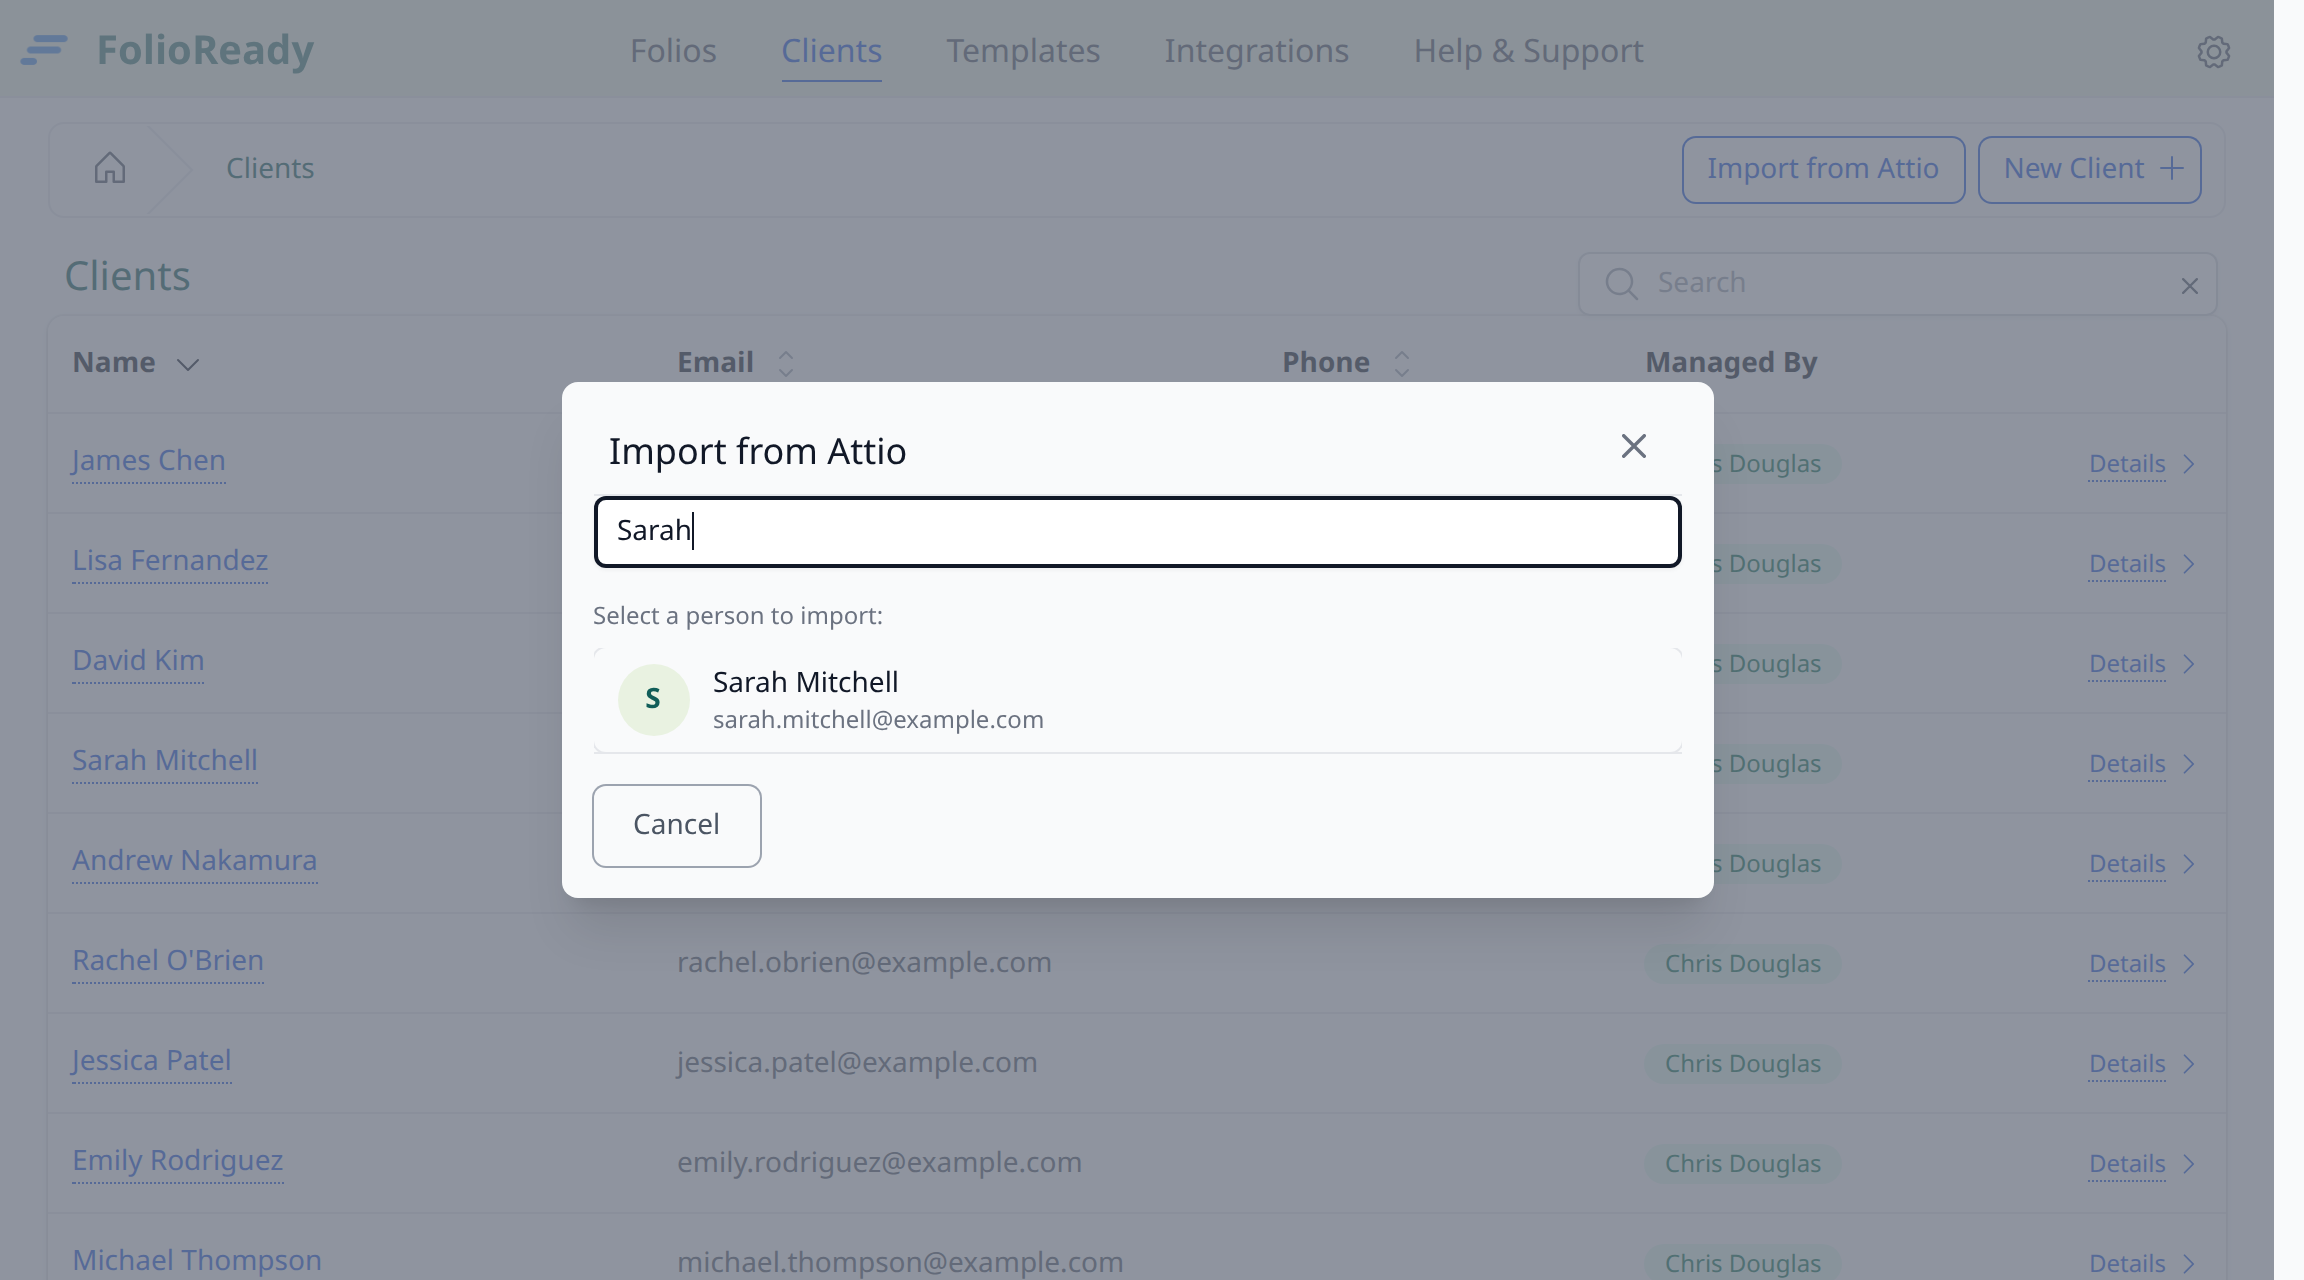
Once connected, an Import from Attio button appears on the Clients page.
Step 1: Search for a Person
Click Import from Attio to open the import page. It opens on your most recently updated Attio people — no need to type first — and searching by name or email narrows the list.
Step 2: Client Created
Press Link to Attio on their row. The person becomes a FolioReady client with their name and email pre-filled from Attio, and their record opens. Pressing it on someone already in FolioReady opens the client you already have rather than creating a second — the same is true of a client you added by hand under the same email address, who is linked instead of duplicated.
Mapping Folio Fields to Attio Attributes
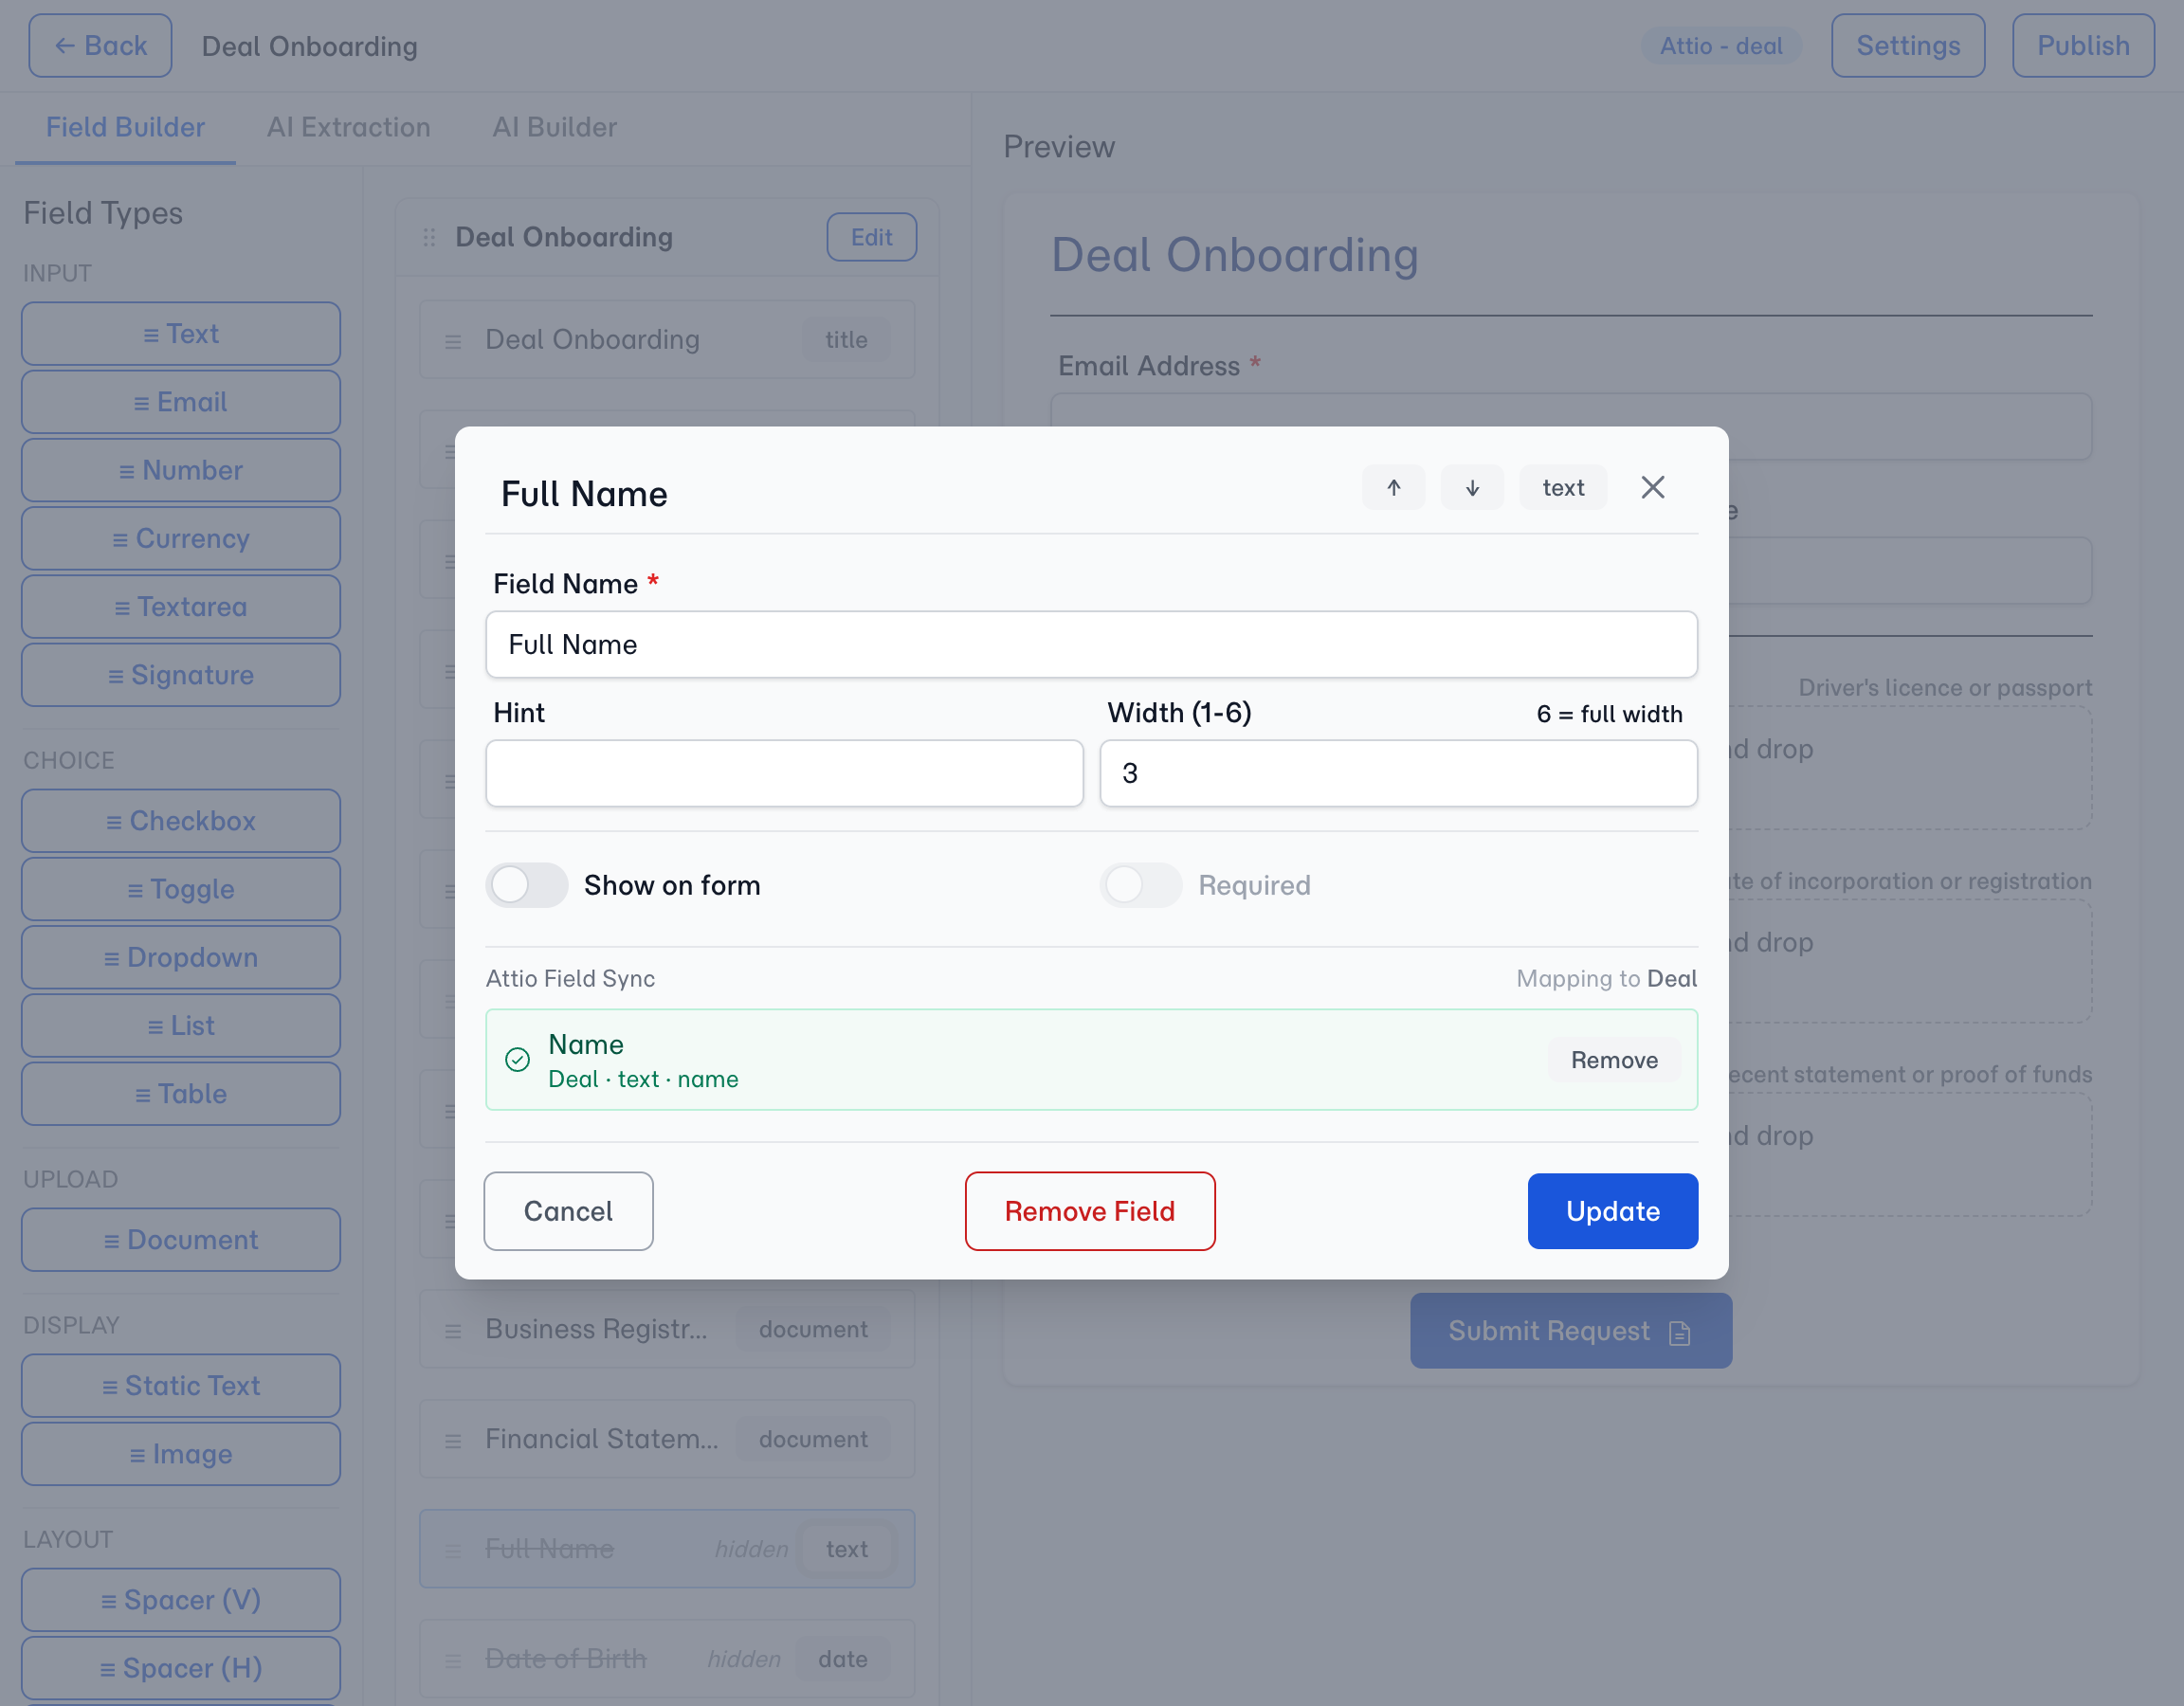
In the template builder, every canvas field can be mapped to an attribute on the Attio object the template files against — whichever object you set as the template's Document Target, such as the Person or a related Deal. When a client completes a folio, FolioReady writes the collected values onto that record.
Using an existing attribute
Open a template in the builder and click any canvas field. Under Attio Field Sync you'll see which object the template maps to, and a list of that object's attributes loaded live from Attio — pick one.
Creating a new attribute from FolioReady
If you need an attribute that doesn't exist yet, click Create field inline. FolioReady creates a new custom attribute on the selected object type with a folioready_ prefix and selects it for you. No need to leave the template builder.
Keeping the object list current
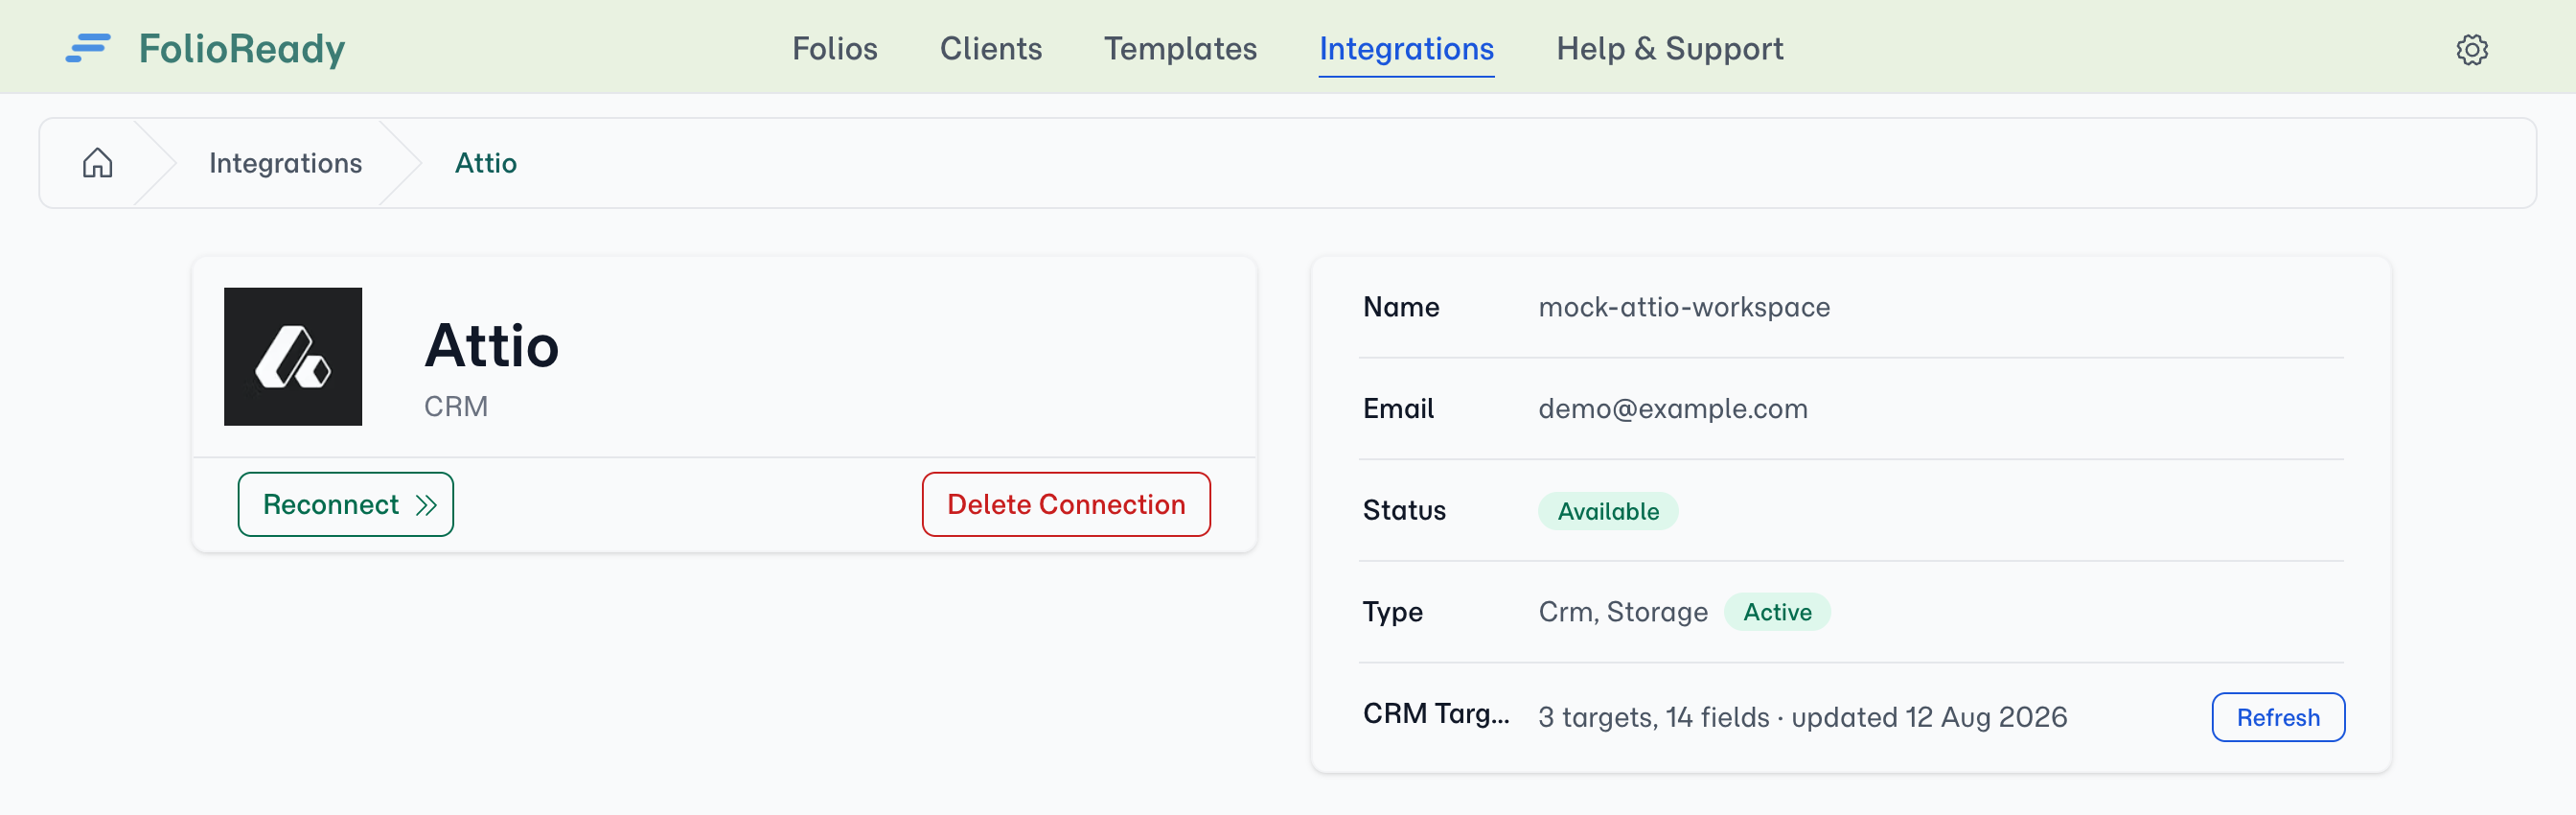
FolioReady caches your workspace's objects and their attributes so the builder loads quickly. If you add a new object or attribute in Attio and it doesn't appear in the picker, open Settings → Integrations → Attio and click Refresh next to CRM Targets.
The folioready_ prefix
Every attribute FolioReady creates uses an api_slug prefixed with folioready_. Search for that prefix in Attio's object settings to see everything the integration manages.
Send a Folio to a Deal
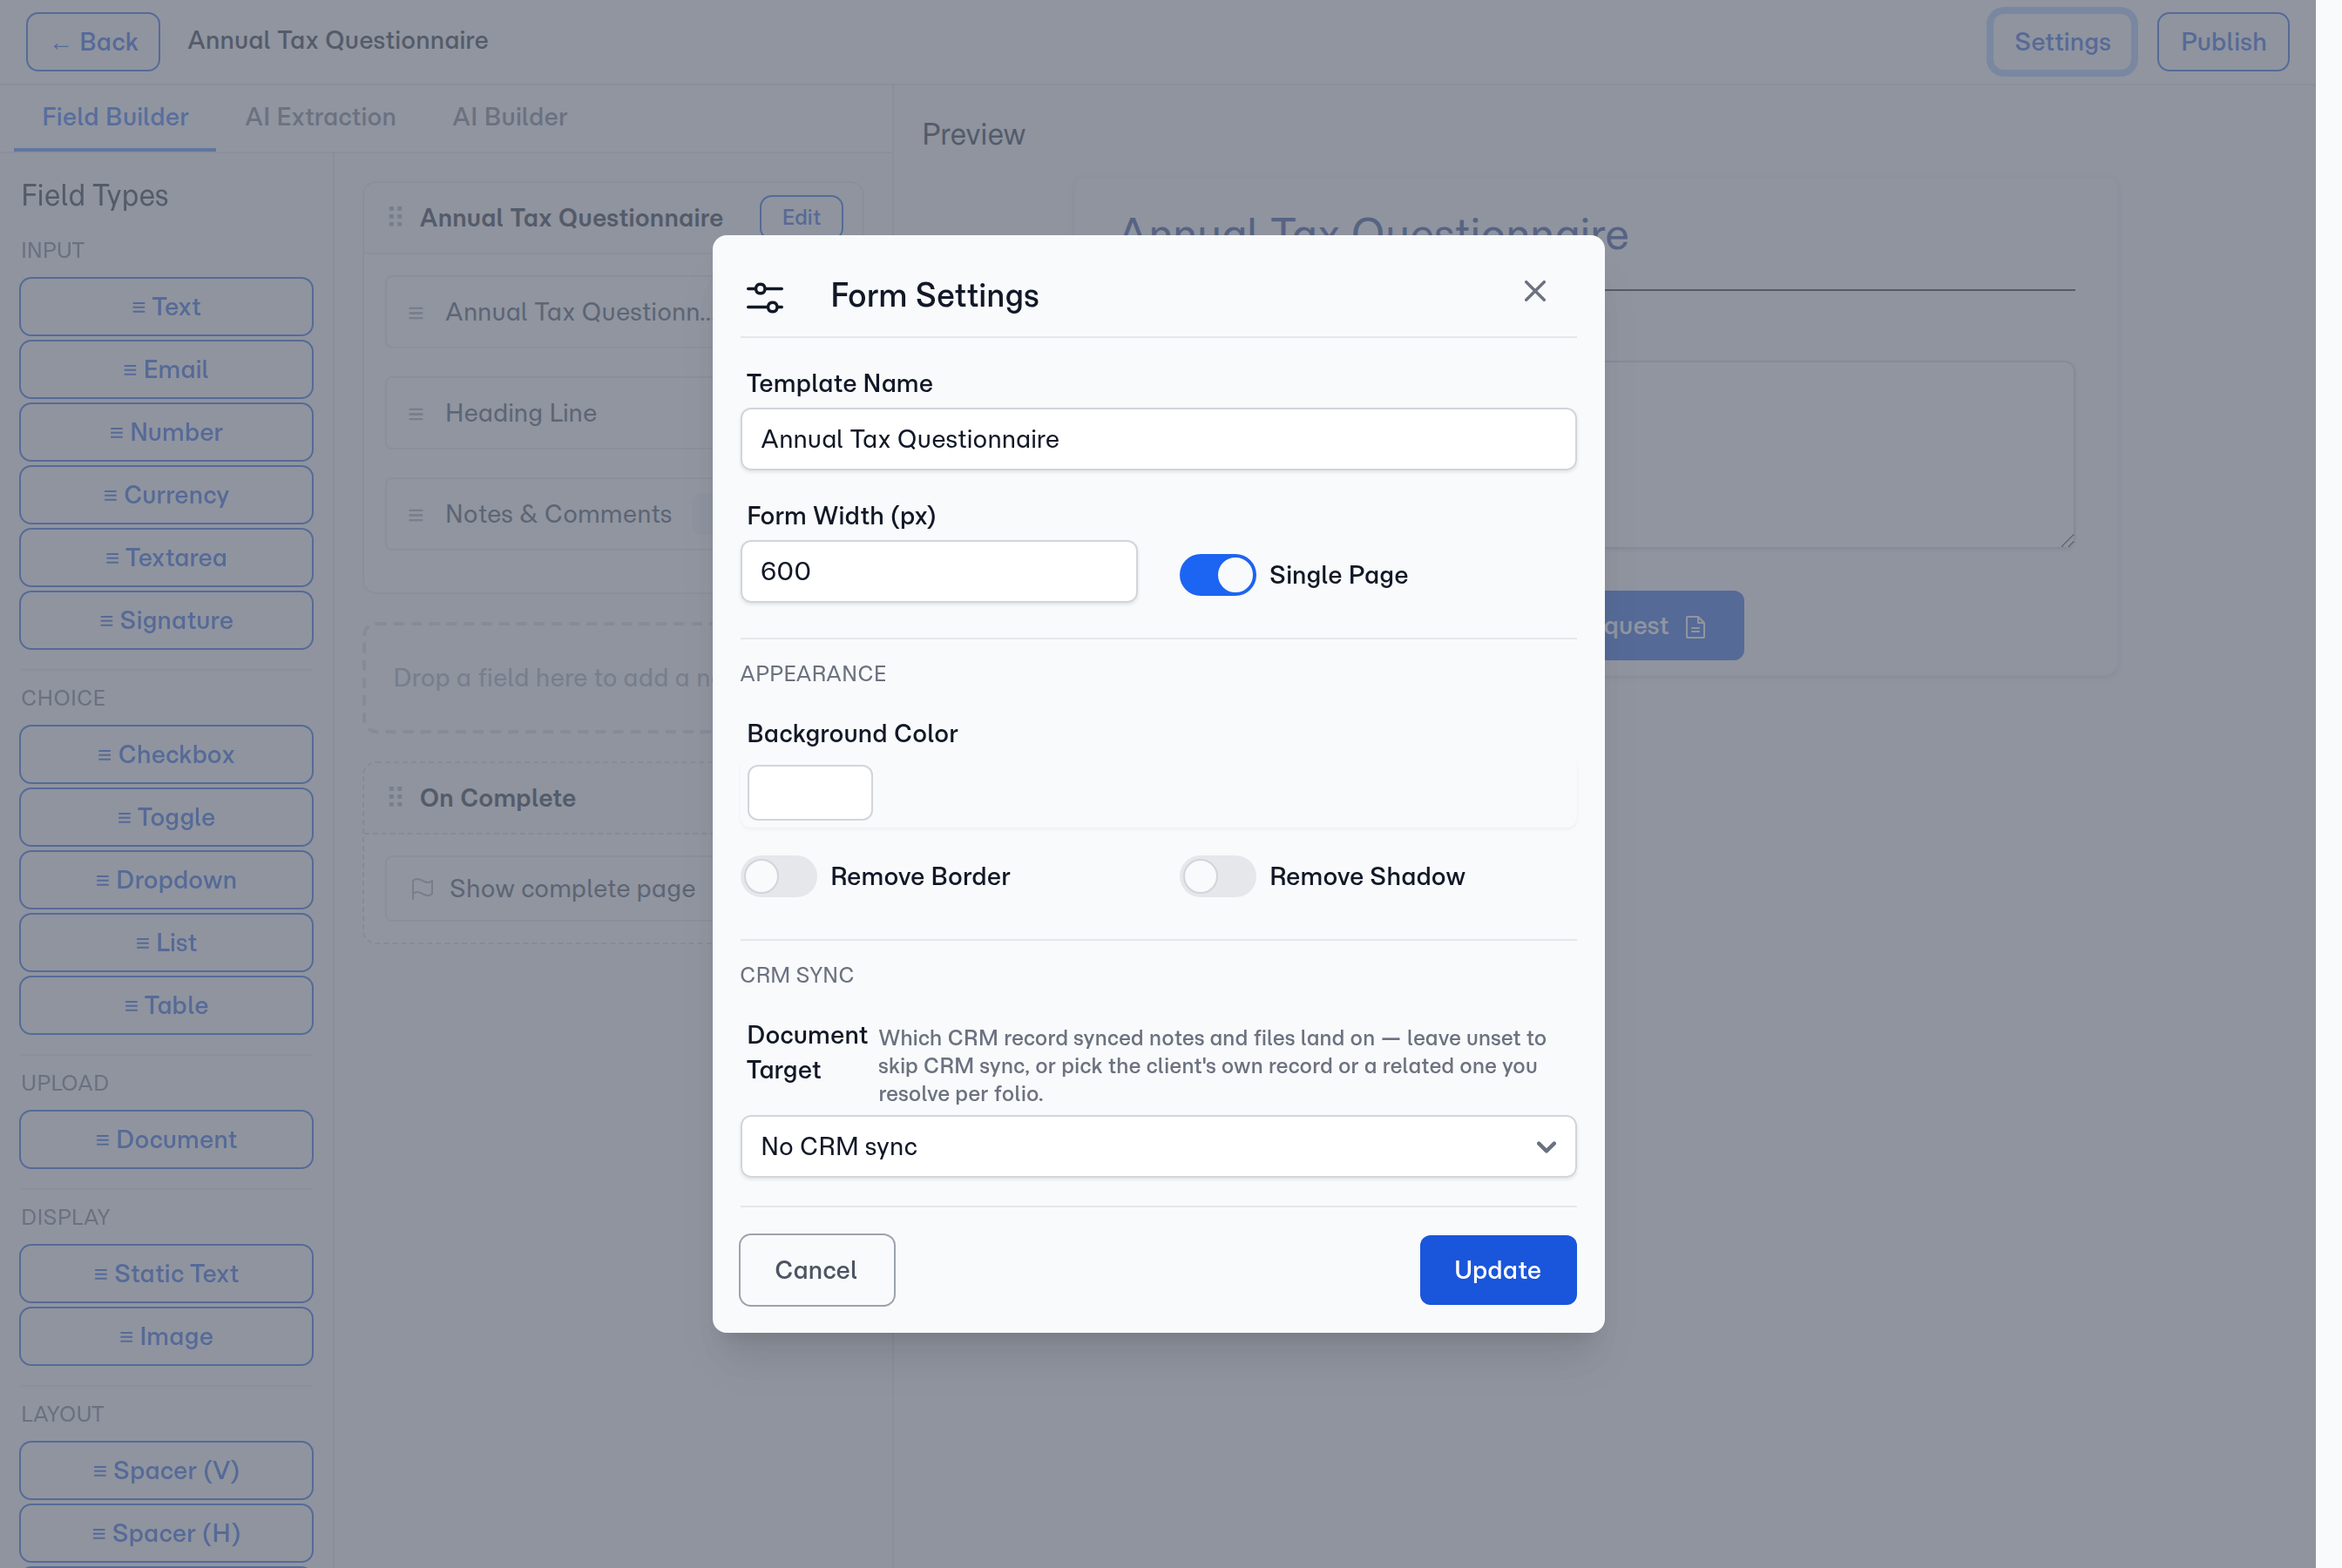
A client record answers "who is this?". A Deal answers "what are we working on?" — and for a lot of teams, that's where the paperwork belongs. In the template builder, open Settings and set the Document Target. The selector lists every object your Attio workspace exposes — Person, Deal, or a custom object — and starts on No CRM sync, so a template writes nothing to Attio until you choose where it should land. Set it to Deal and every folio from that template files against a Deal instead of the Person: its field values, its document summaries, and its mirrored files all land on the same Deal record.
Choosing the Deal
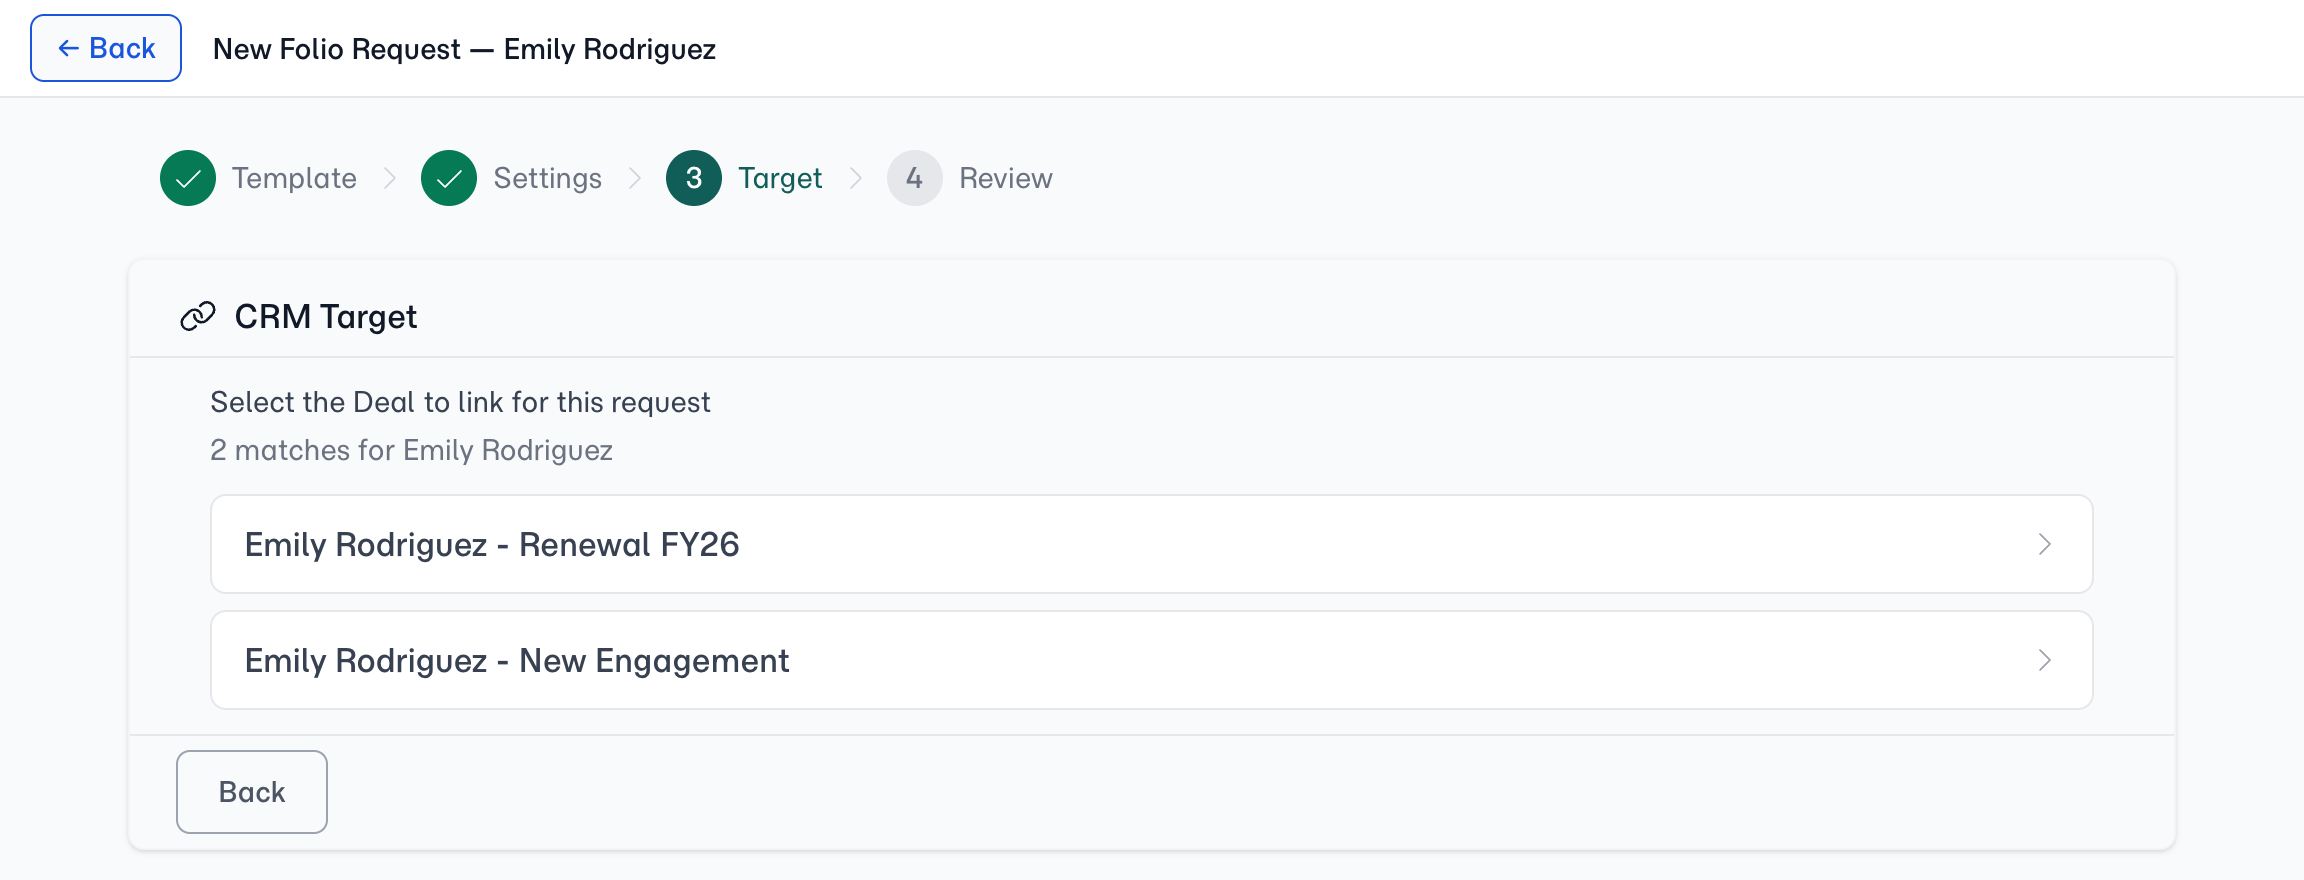
FolioReady never creates a Deal, and never guesses which one. When you create a folio, it looks at the Deals Attio already has linked to that client:
- One Deal — it's selected automatically, and you'll see it named on the folio's Target step.
- Several Deals — you pick the right one before the folio goes out.
- None — the request is refused, and the Target step says so. A Deal-targeted folio for a client with no Deals could only ever collect documents and sync them nowhere, so FolioReady stops rather than creating one. Create the Deal in Attio, or pick a template that files against the Person.
Once the Deal is linked
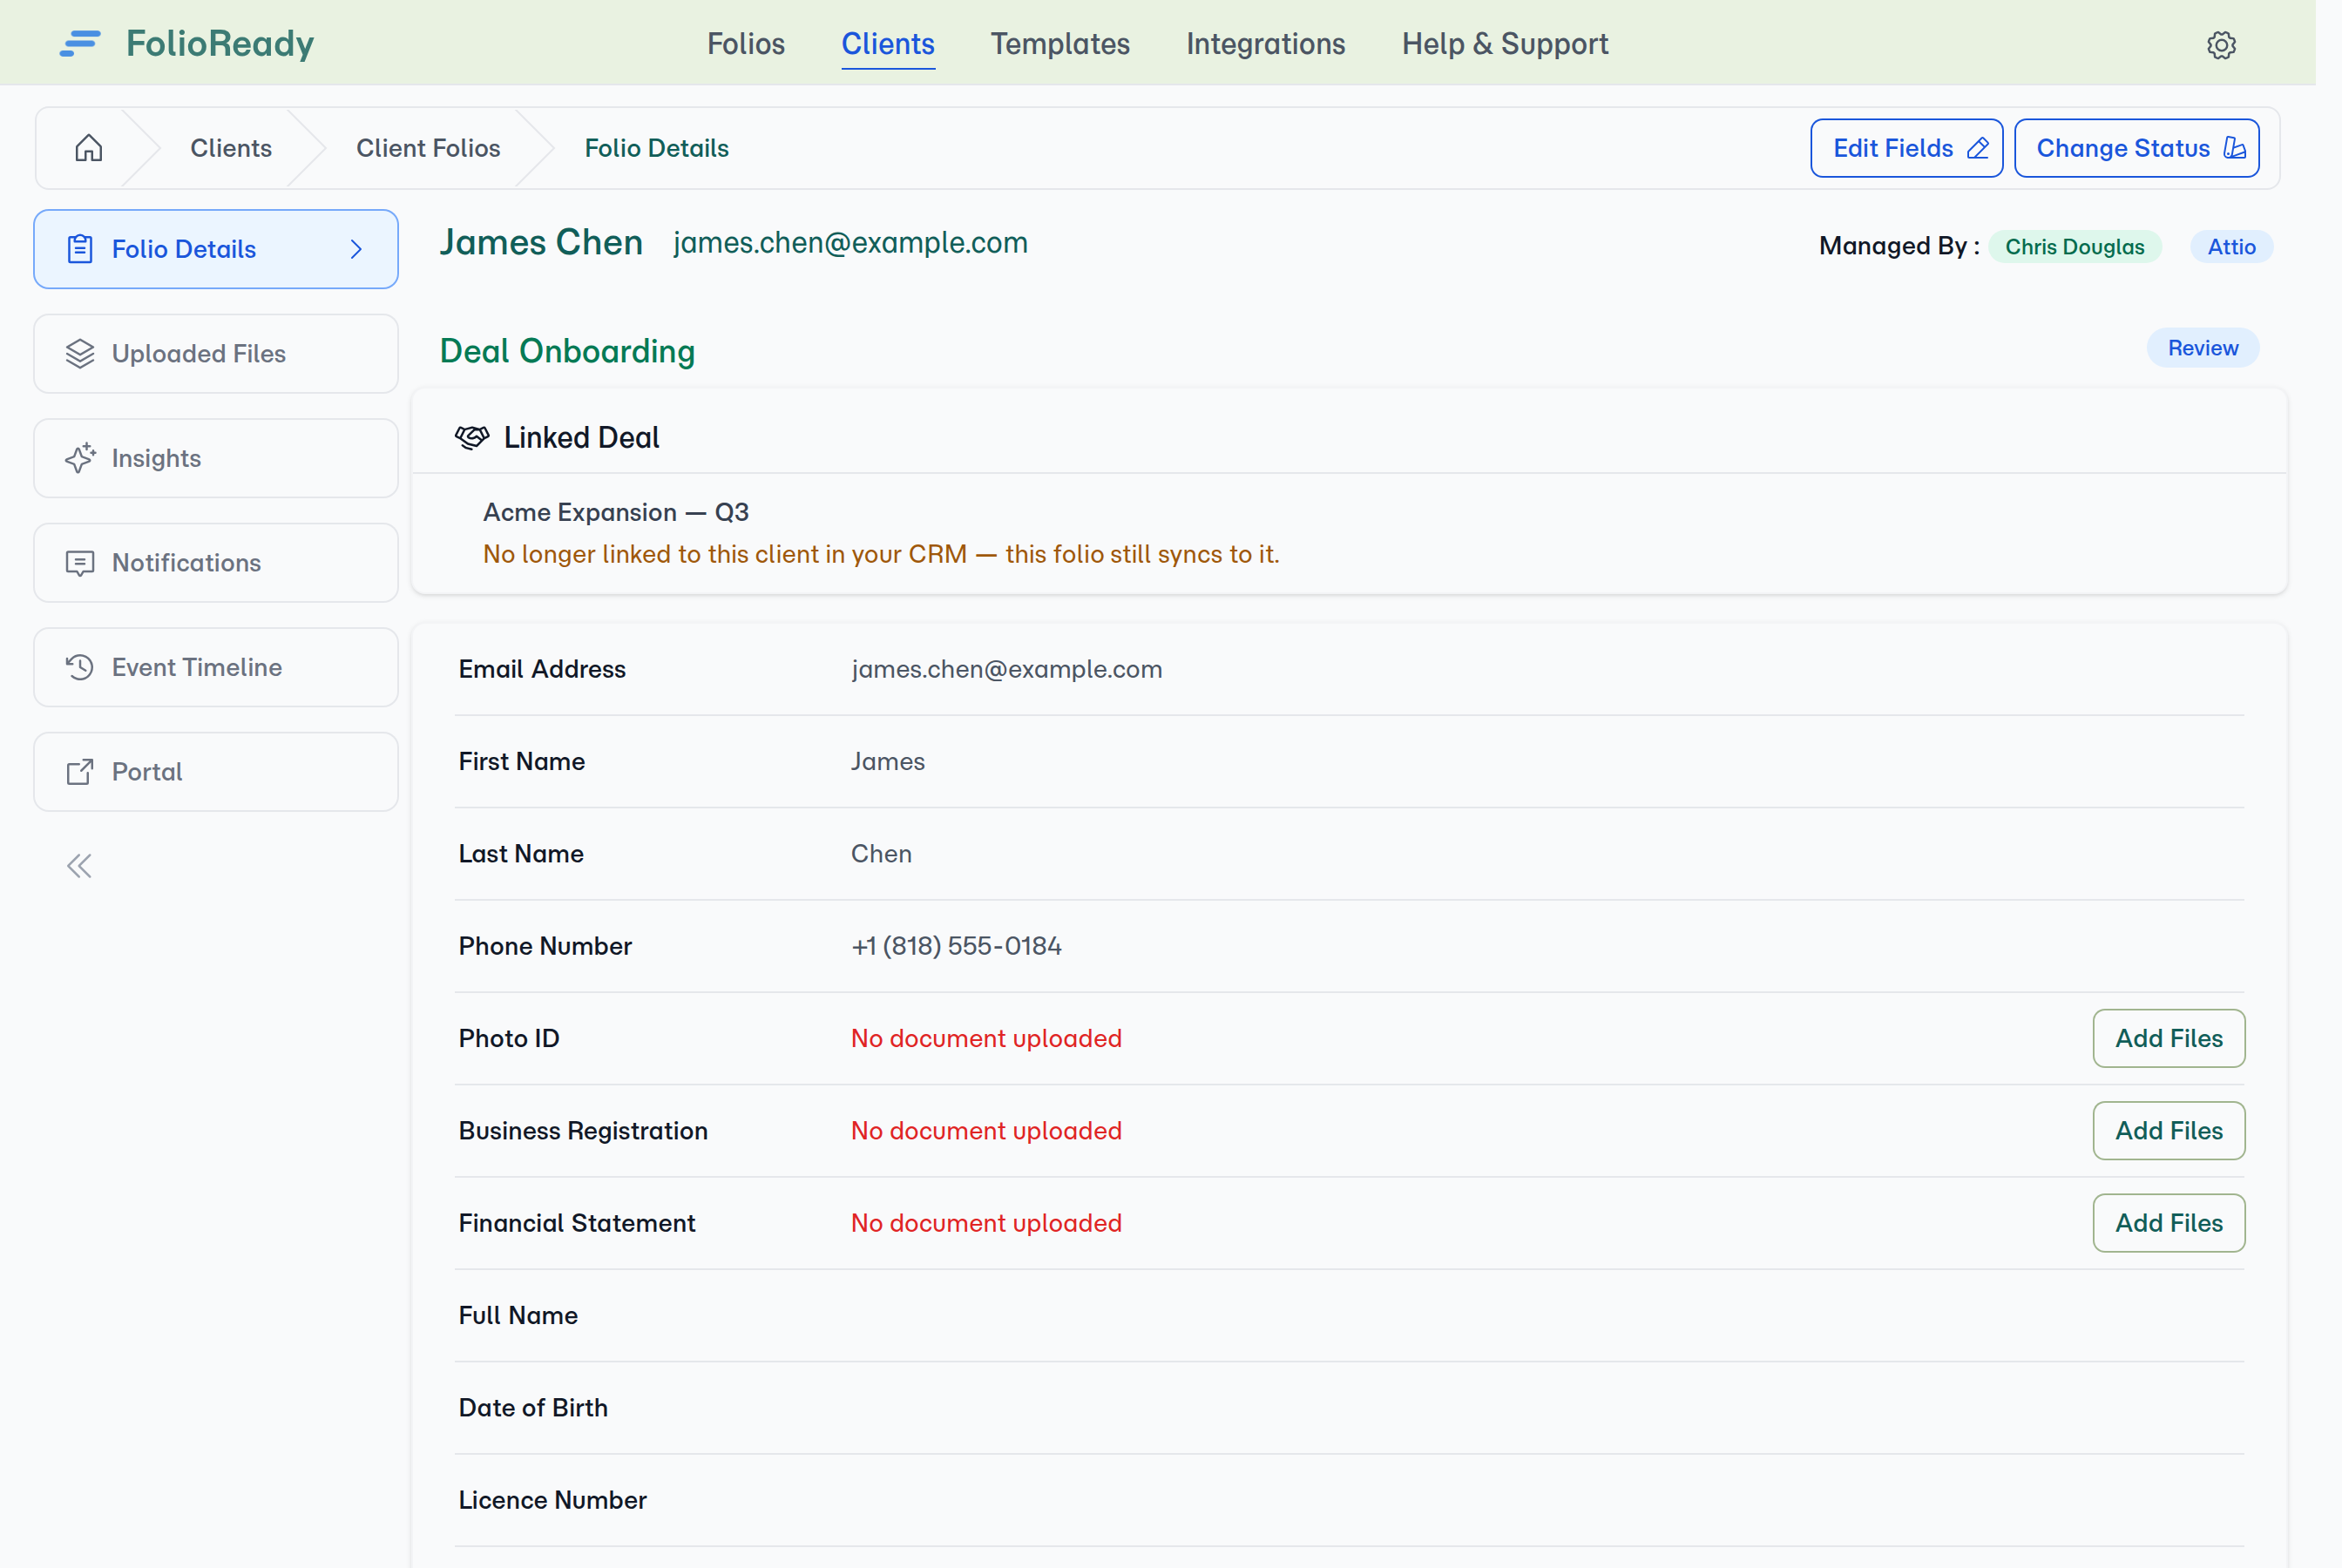
The folio names the Deal it files against — you see it on the folio's detail page, and in the CRM column of your folio lists, so you can tell at a glance what each request is filed against.
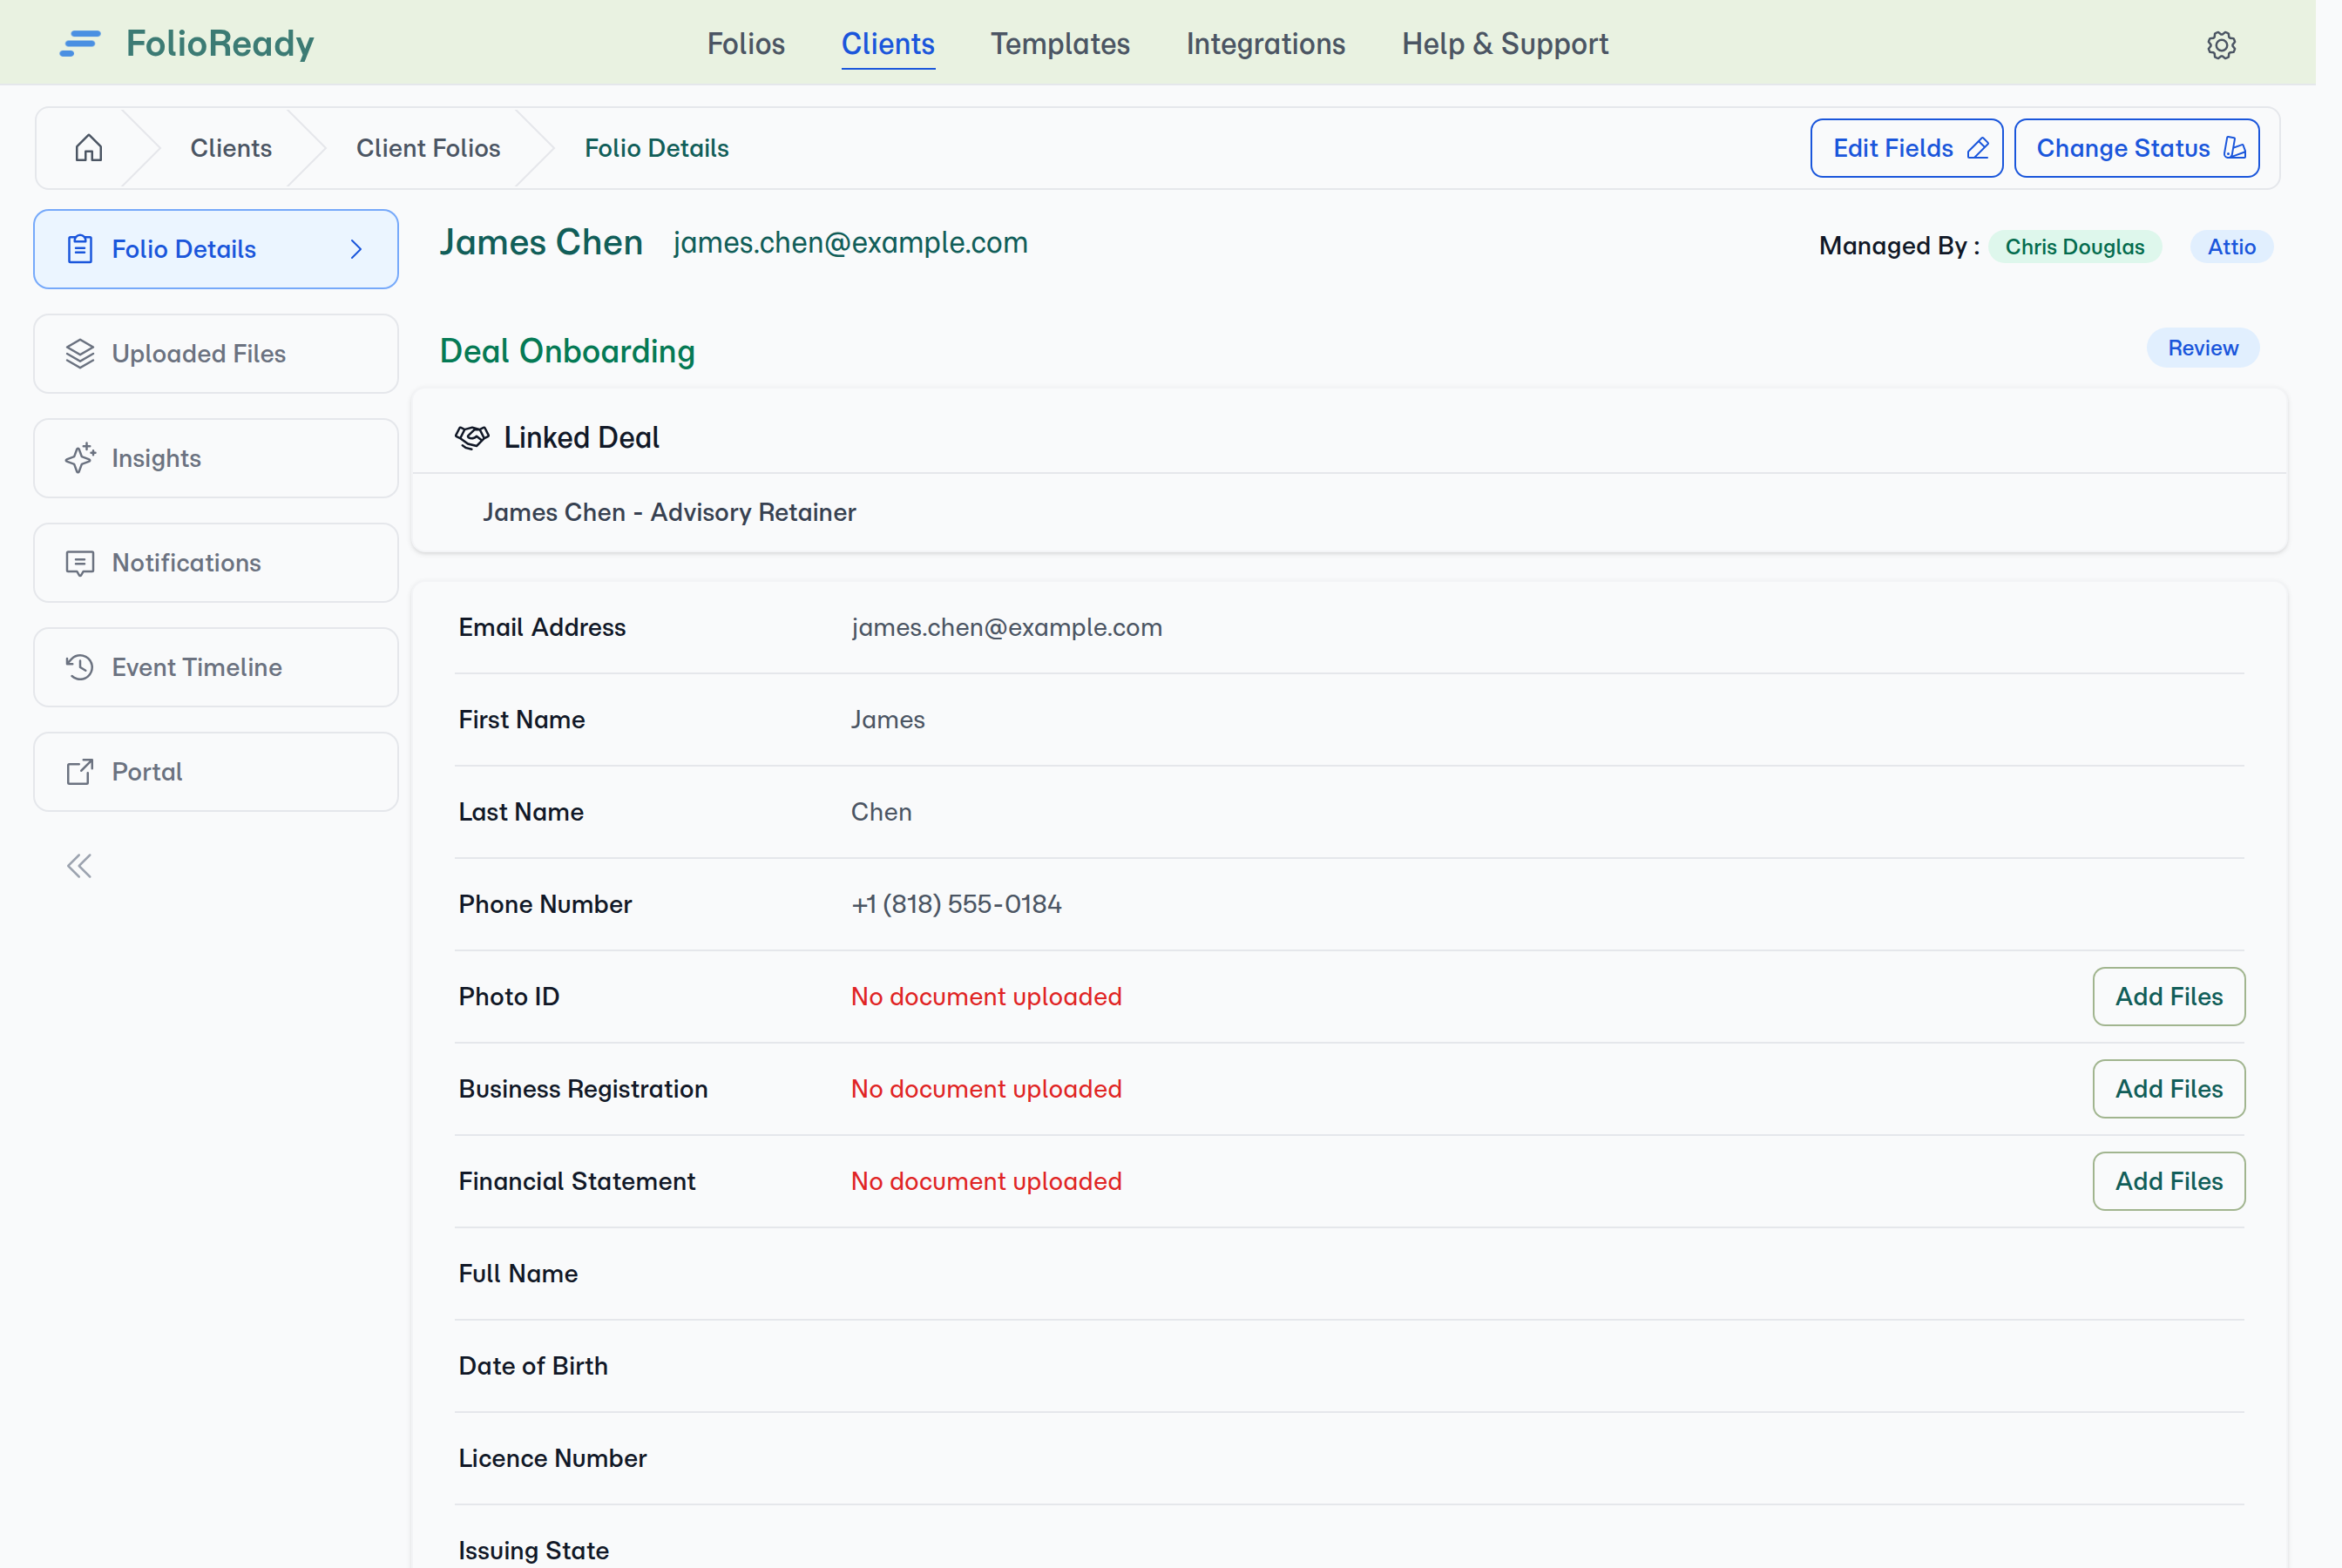
If that Deal is later detached from the client in Attio, the folio flags it — it keeps syncing to the Deal you chose, but you'll know the link has changed.
If the Deal isn't set yet
A folio can still end up without its Deal — if Attio couldn't be reached when the request went out, for instance. Nothing is written to the wrong record: the client fills in the folio and uploads documents as normal, and everything is held safely in FolioReady. What it won't do is reach Attio later on its own — a folio that names no record has nowhere to write, and the Deal can't be chosen from the folio's page after the fact. Send a fresh request once the Deal exists in Attio.
One target per template
A folio files against a single record — all of it, or none of it. Splitting one client's paperwork across a Person and a Deal would leave your team checking two places, so the Document Target applies to the whole template.
If you switch to a different CRM
A Document Target points at a record in Attio specifically. If you later connect a different CRM in its place, any template still aimed at an Attio object has nowhere valid to file — so FolioReady flags it rather than writing to the wrong place. The template shows a yellow (stale) badge in your template list, and its folios hold their sync until you reopen the template and pick a target in the new CRM. Reconnecting the same Attio workspace leaves everything as it was.
Document Summaries as Notes
When a client uploads a document to a folio, FolioReady's AI reads it and writes a short plain-language summary. That summary is posted as a note titled "Document synopsis: [filename]" — so your team can tell what each file contains without opening it.
The note lands on the record the folio targets: the linked Person, or the folio's Deal if the template's Document Target is set to Deal.
Summaries post automatically once the AI finishes reading a document. A file that's still processing, or that couldn't be summarized, is skipped until its summary is ready.
If summaries aren't appearing, check that FolioReady has Notes read/write permission in Attio: your connection may pre-date that permission. Disconnect Attio under Settings → Integrations and reconnect — the consent screen will now ask for it.
Choosing what syncs
FolioReady pushes folio data to Attio on its own — there's no button to press. Field values go onto the record's attributes whenever they change: when AI extraction fills them, when you edit a field on the folio, and when you accept an AI value or an Insight proposal. Each document's summary goes out as a note once the AI has finished reading that file.
The two are switched separately under Company → Integrations: Sync Field Values and Sync Document Synopses. Turn the synopses off and field values keep flowing, which is the setting to use when your team wants the data on the record but not the AI's summaries in the timeline.
FolioReady Panel Inside Attio
A separate Attio app — installed from a FolioReady-provided invite link — adds two widgets: one to your Person records, and one to every other kind of record in your workspace. They work alongside the integration above; they do not replace it.
The second widget isn't limited to Deals. It appears on any object Attio holds — Deals, Companies, and the custom objects your workspace defines — because whether a record can be filed against is something FolioReady works out when you open it, not a fixed list decided in advance. The only records it stays off are your Person records, which have their own widget, and Attio's own system objects, which hold nothing to file against.
Each widget is scoped to the record it sits on. Whichever one you open, the folio files against the record you are looking at, so there is never a target to choose. That also decides which templates it offers: the Person widget lists templates that file against a Person, and the record widget lists templates that file against that kind of record. A template with no Document Target belongs to FolioReady's own create page, which shows every template.
The Person widget
- Linked client summary: folio count, name of the most recent request, and its status — for every folio that client has, including ones filed against a Deal.
- Unlinked Persons: a one-click "Link to FolioReady client" button. FolioReady uses the Person's name and email to find an existing client or create a new one.
- No email yet: the widget asks you to add an email to the Attio Person first.
- Open in FolioReady: opens a one-time login link to that client's folios, in a new tab.
The record widget
Appears on Deals, Companies, and your own custom objects.
- The record's folios: only what was filed against this record, each named with the client it belongs to — a record can carry requests for more than one of its people.
- Who the request goes to: a folio has one client and that client is who FolioReady emails, so the widget reads the people the record references. One person, and it uses them. Several, and it asks which is the primary client. None, and it says so — there is nobody to send a request to until you link a person to the record.
Creating a request
Pick a template, review, and send. Nothing is created until you press Create Request, because creating it emails your client.
Installing the panel
- Open FolioReady in the Attio app store and click Install app.
- Attio walks you through installing the app into your workspace.
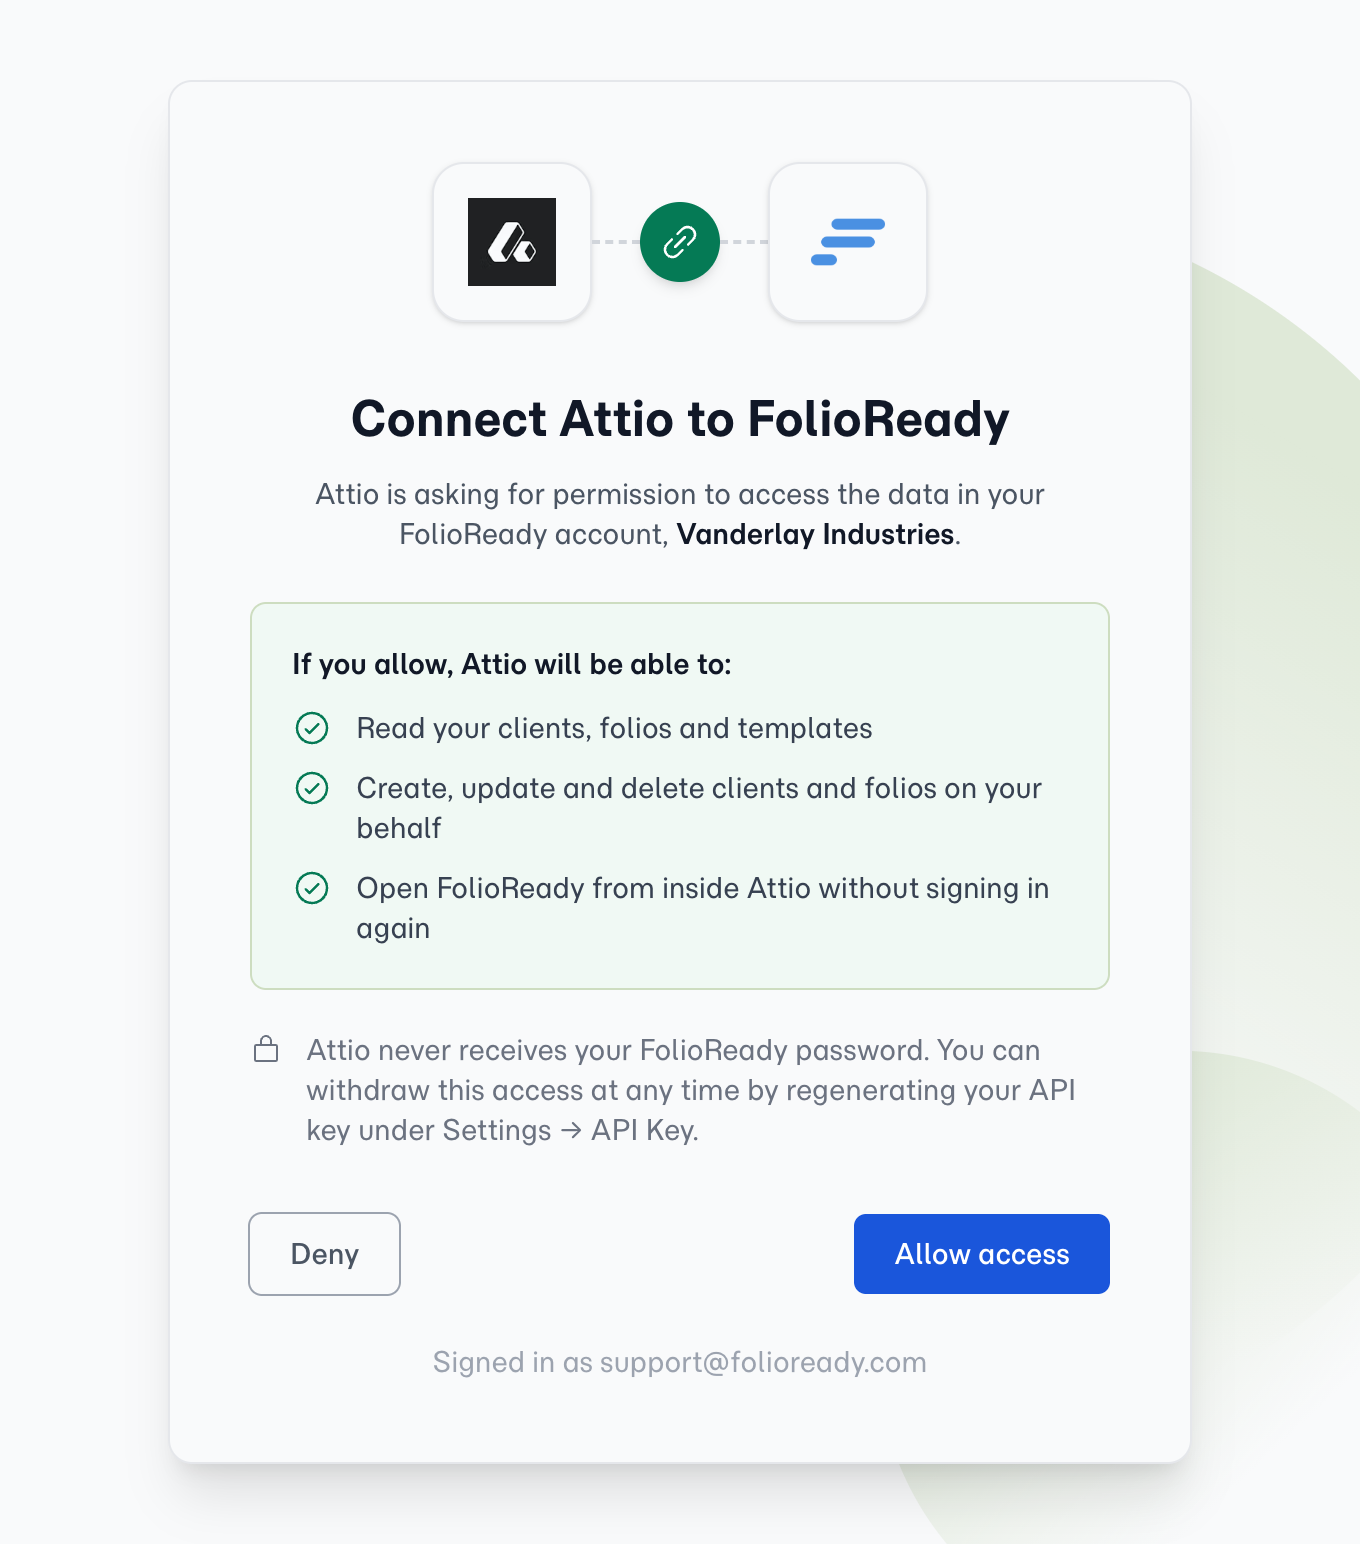
- When prompted, click Connect FolioReady and authorize the connection. You'll be signed into FolioReady (if you aren't already) and returned to Attio — no token to copy.
- Open any record in Attio — the matching FolioReady widget appears in the right rail.
One FolioReady account per Attio workspace
If you run multiple Attio workspaces, use a separate FolioReady account for each. The connection is scoped to one FolioReady tenant.
Reconnecting FolioReady
If the connection is ever lost, reconnect inside Attio:
- Open the FolioReady app's settings in Attio (App settings → Connections).
- Click Reconnect FolioReady and authorize again. The widgets pick up the new connection immediately on the next page load.
If a widget ever shows "Reconnect FolioReady from the app's connection settings", the connection was revoked or your company API key was regenerated — use the same step to reconnect.
Mirror Files to Attio
Pick Attio as your storage destination in Settings → Integrations → Edit, and every file from a completed folio attaches to the record that folio targets — the linked Person, or its Deal. The files sit in the record's own Files panel, alongside anything else your team has attached there.
Setup
- In FolioReady, open Settings → Integrations → Edit.
- Set Store Files to Attio and save.
- If FolioReady responds with "Reconnect Attio to grant FolioReady permission to upload files," disconnect Attio under the integration list and reconnect — Attio's consent screen will now ask for permission to read and write files. Then redo step 2.
What you'll see in Attio
On any Person record that's linked to a FolioReady client, open the Files panel — the section files from that client's folios are listed there. On a Deal-targeted folio, they appear on the Deal record instead.
Files mirrored before this change sit inside a FolioReady folder on the record. They stay where they are; new uploads land alongside it.
Notes
- Files larger than 50 MB stay in FolioReady only. Attio's File API caps individual uploads at 50 MB. If a section's file-size limit allows uploads above that, the FolioReady copy is fine; the Attio mirror for that one file shows a failure status.
- Clients without a linked Attio Person are skipped. If a FolioReady client isn't connected to an Attio Person, files stay in FolioReady's primary storage and don't appear in Attio. Link the client to a Person to start mirroring.
- One FolioReady account per Attio workspace. If you run multiple Attio workspaces, use a separate FolioReady account for each.
How It Works
Attio                                FolioReady                         Attio
──────                               ───────────                        ──────
Search people    ◄────────────       Import from Attio
Person selected   ──────────────►    Client created/linked

                                     Template builder:
                                     Pick Attio attribute  ───────────►  Read object attributes
                                     Or create new attribute ─────────►  Create attribute with
                                                                          folioready_ prefix

                                     Folio completed        ──────────►  Person/Deal attribute
                                                                          values updated

                                     Document + AI summary  ──────────►  Note on Person:
                                                                          "Document synopsis: …"
All sync happens in the background. There's no delay or extra steps in your workflow — events are processed automatically as they occur.
Attio access tokens are long-lived, so you do not need to reconnect under normal circumstances.
Disconnecting
To disconnect Attio:
- Go to Settings > Integrations
- Click Delete Connection on the Attio integration
- Confirm the disconnection
After disconnecting, no more folio data writes to Attio. Custom attributes already created in Attio remain there — disconnecting only stops future sync. To remove them, filter Attio's object settings for the folioready_ prefix and delete the ones you no longer need.
Troubleshooting
"Import from Attio" button not showing
The import button only appears when your company has Attio connected as the CRM service. Check Settings > Integrations > Attio — the status should read Available.
Attributes not appearing in Attio
Custom attributes are created on demand — the first time you use the "Create field" button in the template builder. Until then, no folioready_ attributes will exist in your Attio workspace.
If you used "Create field" but don't see the attribute, reload Attio's object settings page and filter the list for the folioready_ prefix.
Sync fails after access is revoked
If your connection status turns red, your Attio access token was revoked — typically because someone removed FolioReady from Attio's app settings.
Click Reconnect on the integration page to re-authorize.
Wrong workspace selected during authorization
If you have multiple Attio workspaces and picked the wrong one, click Delete Connection, then Connect again, and select the correct workspace on the Attio authorization screen.
Panel says "Reconnect FolioReady from the app's connection settings"
The Attio app's connection to FolioReady was revoked or your company API key was regenerated. Open the FolioReady app's settings in Attio (App settings → Connections), click Reconnect FolioReady, and refresh the Person record.
Panel says "Add an email to link"
The Attio Person doesn't have an email address yet, so the panel can't create or match a FolioReady client. Add an email to the Person record in Attio and reload the page.
Panel shows the wrong folios after linking
Each FolioReady client maps to one Attio Person. If you've accidentally linked the wrong Person, edit the FolioReady client (in FolioReady) and either change the linked Person or unlink and re-link via the Attio panel.
Related
- HubSpot Integration — Import HubSpot contacts and write folio data onto Contact and Deal properties
- Pipedrive Integration — Embed FolioReady inside Pipedrive's sidebar and sync contacts bidirectionally
- Salesforce Integration — Sync contacts, track document collection, and log activity in Salesforce